I needed a bed in our multi-purpose guest room and wanted a full-size bed in there. My Underlit Pallet Bed is what I came up with! I started by planning it out on graph paper and did a test dry-fitting with the pallets on the ground in the way I had it planned out. I thought I had it the way I wanted, but I still cut it out backward. So, plan B was to add on an extra section and 9″ on both sides. OK, I made it over that hurdle! Time to really get building!
How I built my Underlit Pallet Bed:
First, I put the pieces together to make the bottom of the pallet bed, including those patches mentioned above. Since I had to put legs on it, I began by assembling it upside-down. I began with the bed legs and made them out of salvaged 2 x 6” lumber. They were screwed onto the bottom of the board one at a time, mounting them successively into one another. I made the legs four layers deep, creating 8” of lift. Finally, I put the legs in places I thought may need support, also bearing in mind that I don’t want to smash my toes while making the bed.
Underlit Pallet Bed – painting, lighting, and finishing steps along the way:
Time to paint! This was going to be too heavy to do all the painting at once, so I had to plan accordingly. I painted the underside section and let it dry. Next, I added a string of tiny lights in the middle between the boards, making sure I had the correct plug ends at the bottom at the top, as I planned to put lights in the head and foot boards and wanted them all to be on at the same time. I fastened them in with zipping ties and staples.
To finish the feet, I added peel-and-stick felt bumper pads to prevent scratching the floors and to make it easy to move the furniture for cleaning. My husband and a friend’s son flipped the bed over for me after everything was dry.
Underlit Pallet Bed – the Headboard & Footboard:
To make the headboard, I varnished and sanded one pallet and attached it to the bed after it dried. It needed another half a pallet to complete the width, which I cut, varnished, and attached to the head of the bed and to the piece already there. Next, I put a power strip and a phone charger for the little phone cubby, and another power strip plugged into the first one, to use as the on/off switch for the lights. I attached a string of lights inside the headboard and plugged them into the ones under the bed.


Here’s the little phone charger cubby hole I made too. I pre-routed the charger cord.
For the first part of the footboard, I used part of a pallet but added wood to fill in the spaces between the natural deck boards. I sanded and varnished as described before, and let it dry. Then I attached a string of lights to that part and plugged them into the ones under the bed.

Headboard and footboard are installed. The second piece of the footboard hasn’t been added yet. Just wanted to show the step-by-step process for you.
To make the last piece of the footboard, I put leftover pieces from other projects, but had a last minute idea! I decided to put holes with my 3/4″ drill bit and inserted flat glass marbles in the holes.

Holes drilled and marbles installed. Make sure the hole is close-fitting, but you shouldn’t have to pound the marbles in – remember, they’re GLASS and will shatter if the hole isn’t drilled to the right size.
Underlit Pallet Bed – evaluation and last-minute modifications:
The pictures show it before I touched up the holes and smoothed them out. When it was dark, I didn’t like how poorly the light showed through the marbles, so I added more slats of wood, and a piece on each end to close it in more. Now the light shines through the marbles in the dark.

Here’s a picture of the marbles lit up before I modified it.

Here are the lit-up marbles after I modified and enclosed the footboard more. Much better!
I had most everything around here that I used to make this Underlit Pallet Bed, with the exception of the varnish. I used about a quart and a half to do the footboard and headboard. It turned out a lot better than I thought it would. Soon the family will be trying it out, and I hope they’re very surprised!
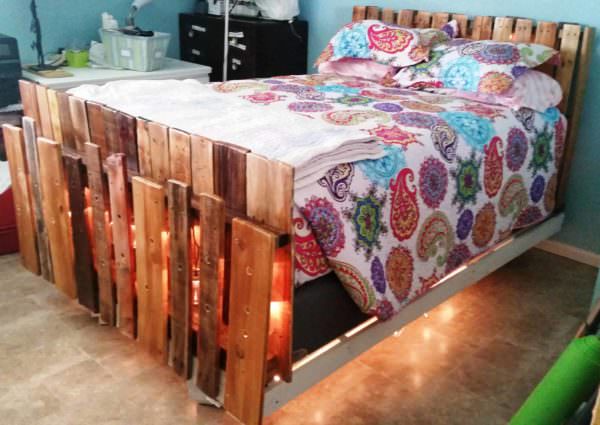
Final project. Bed made and lit up.
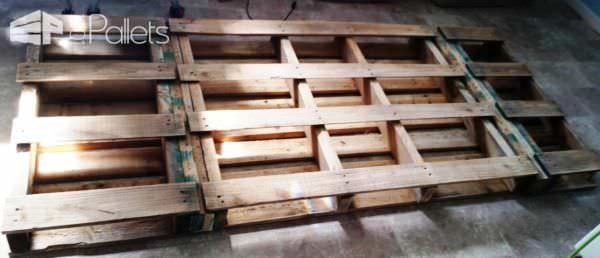

Building the support feet. Some are already painted, but I decided I wanted more to prevent sagging. I also added little flooring protectors – those peel-and-stick felt furniture pads.

Here’s a shot of that additional section I had to add to the bed frame.


Zip ties, side cutters, staples, drill, hammer, and more items to install the lights and secure the wires.

The bed frame, right-side-up, lit up to test everything and starting to install the headboard.

Lights in the headboard! :-D


Underlit Pallet Bed – test-lighting!


