I wanted to make a set of sliding doors for the closet in this room because the bed is so far over that it gets in the way of opening the closet door. The perfect solution was to create a pair of Sliding Pallet Barn Doors! And with a Stanley Hardware Sliding Barn Door Hardware Kit, it was easy.
Editor’s note: Please see our page on Workshop Safety whenever making any of your awesome pallet projects. ALWAYS wear all protective gear as recommended by the manufacturers, and ALWAYS wear eye protection!
These Sliding Pallet Barn Doors would look great in an office, in closets, or anywhere you have clearance issues with furniture!
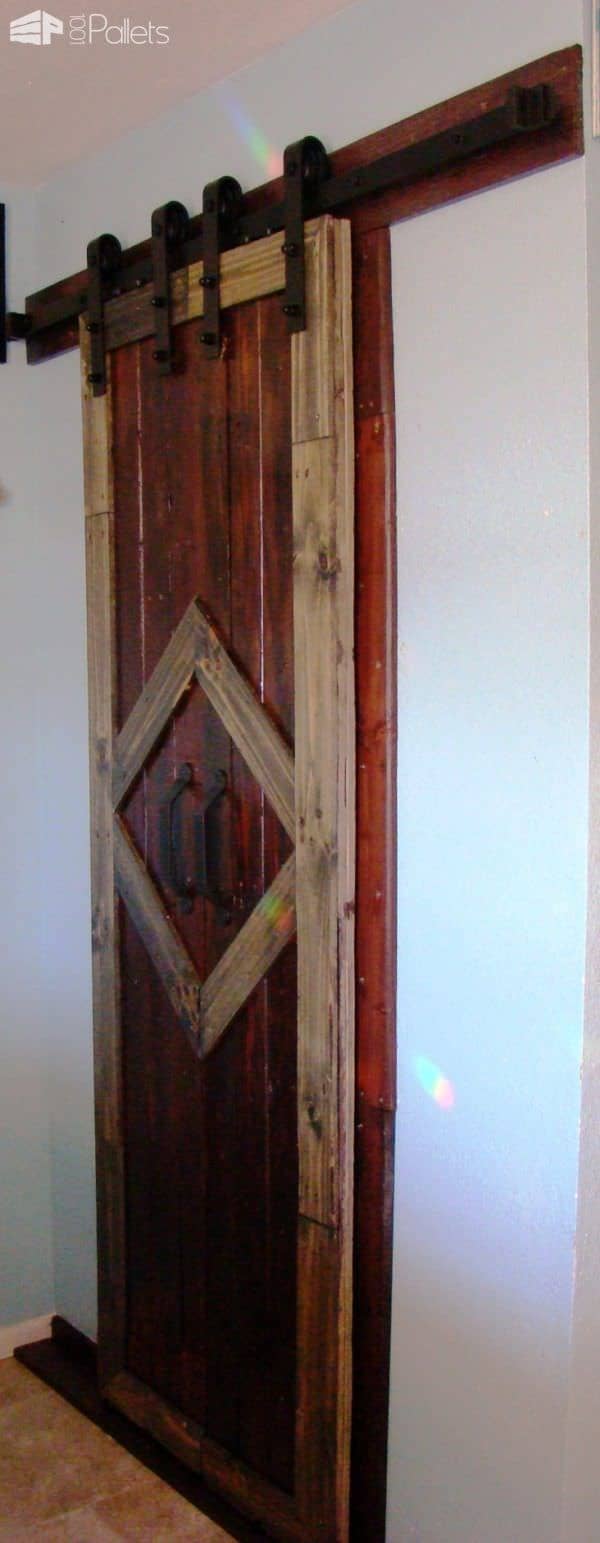
This set of rustic barn doors features a diamond-shaped trim overlay and beautiful Stanley Hardware provided by Stanley Hardware, as well as a rich brown stain by PureColorInc.com. I installed the doors with a decorative interior sliding door kit that was very easy to use. These doors address clearance issues and make my hobby room more functional. Although I had a few learning curves, I’m very pleased with the design and outcome.
Supplies needed to build your own set of Sliding Pallet Barn Doors
- Two sets of this – N186-960 920 Decorative Interior Sliding Door Hardware Kit 72” Oil Rubbed Bronze.
- Two each – N187-010 V1000 Bar Pull 10” Handles Oil Rubbed Bronze
- Screws (ok to use indoor, decorative screws on interior doors) – adjust to the thickness of the wood you’re using
- Stain – any color(s) you like; I used stains by Pure Color Inc.
- The sealant of your choice – polyurethane, varnish, etc.
- 4’ x 8’ ½” thick plywood sheet
- 3-4 pallets, dismantled, nails removed, and sanded (or planned) to the smoothness you prefer.
Planning out your project: Don’t be afraid to revise your ideas!
The original closet door measured 24” wide, with 19” clearance on one wall and only 14” clearance on the other wall. I had to make two narrow doors because I couldn’t make the rail for the sliding rail system stick out past where the wall stopped. I made the doors the size of the opening, but the next set I’ll make about 3 – 4” wider than the opening for aesthetics. When removing the door frame, the opening will be much larger, so consider that. I revised my drawing and ideas a few times during this process and learned quite a bit from this project. Here is the drawing of my project:
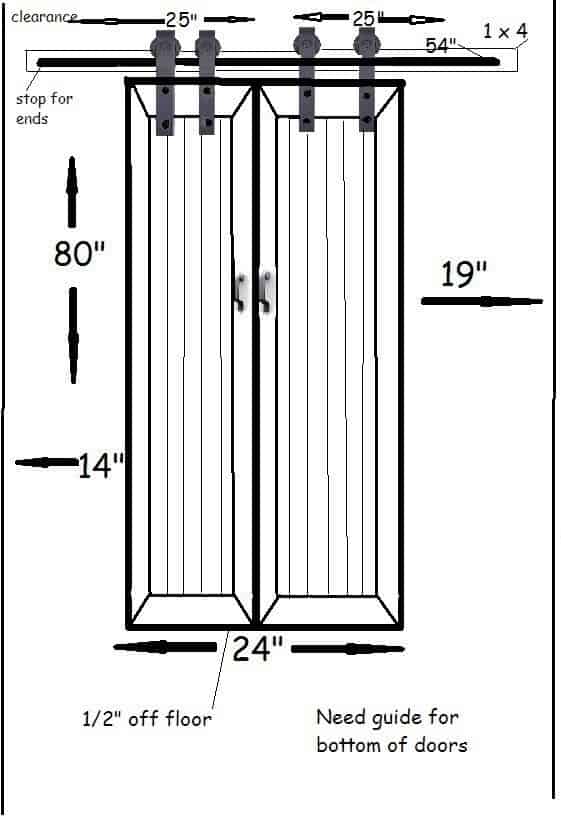
Even though they’re called Sliding Pallet Barn Doors, you can use them in any room – instead of an expensive (and sometimes difficult) pocket door. Close these easily to separate your rooms, in place of closet or bedroom doors, or as actual barn doors!
Removing the Original Door Frame: Prepping for your Pallet Barn Doors
This is what the door opening looks like with the original door frame removed. I attached some of the new trim already in this photo. I stained and applied varnish to the pallet trim boards in advance to reduce odors.


Typical stick-framing uses 2”x4” boards (actually around 1.5” x 3.5” unless it is old timber), so that’s why 3-4” wider would be appropriate. You’ll also need to add a little height to the door for the same reason and more if your door has a threshold.
Don’t Get Warped, Prepping the wood up & handy tips I learned
I selected my pallet wood and thoroughly removed all nails and staples. If you rush this step, you’ll be buying new planer blades if you use a power planer! If you don’t have a planer, sand it instead.
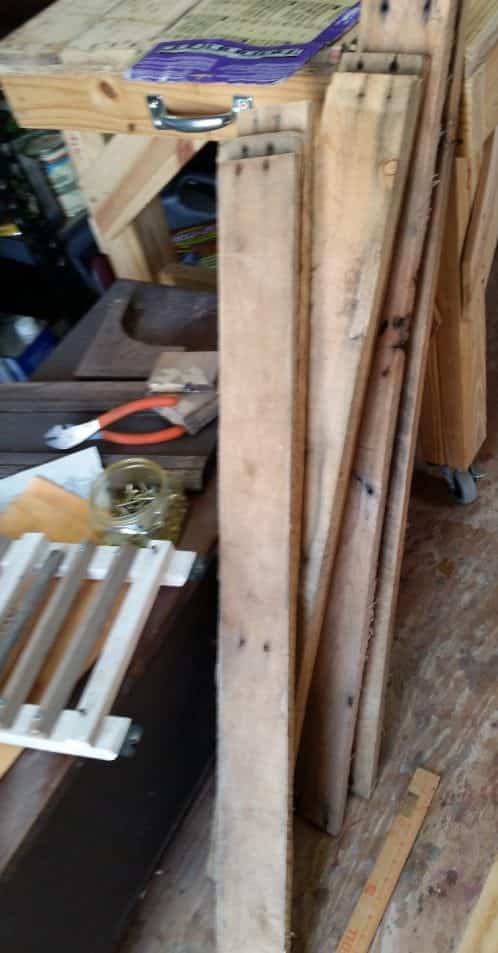
Lesson learned: Store your plywood flat. I stacked the plywood vertically, and it WARPED! This caused some assembly issues later when I tried to straighten it all by screwing it in place. I hoped that this would straighten everything, but it actually began warping the pallet boards! Then I tried to hold the doors down flat with bricks and cinder blocks. It wasn’t a perfect fit on the first try. Don’t fight the warp – just put your plywood flat in the first place!

Laying out – Try it out first & adjust fit as necessary
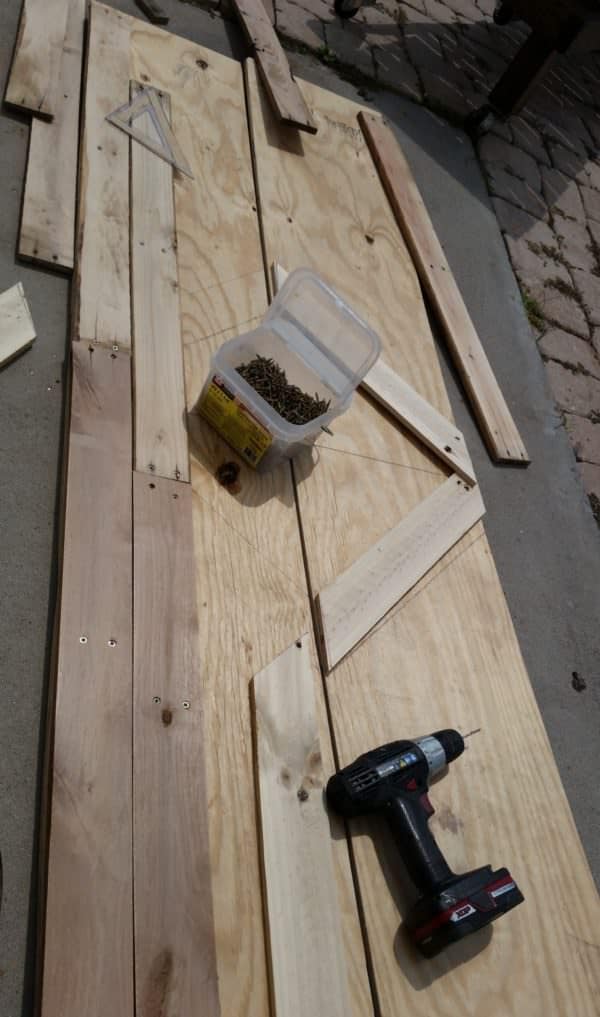
I measured the width of the nicest pallet wood I wanted to use as trim and then drew out a pattern on the plywood to start. Next, I cut the angles necessary and kept those pieces flat on the ground where they wouldn’t get disturbed (or used in error). Next, I laid out the rest of the wood on top of the plywood, installing them with screws after staggering the joints a bit. I didn’t screw on the trim yet. Be sure to check the length of your screws, mine were too long, and I ended up having to grind off the excess with an electric angle grinder. It worked fine, but it’s extra work I could’ve avoided.
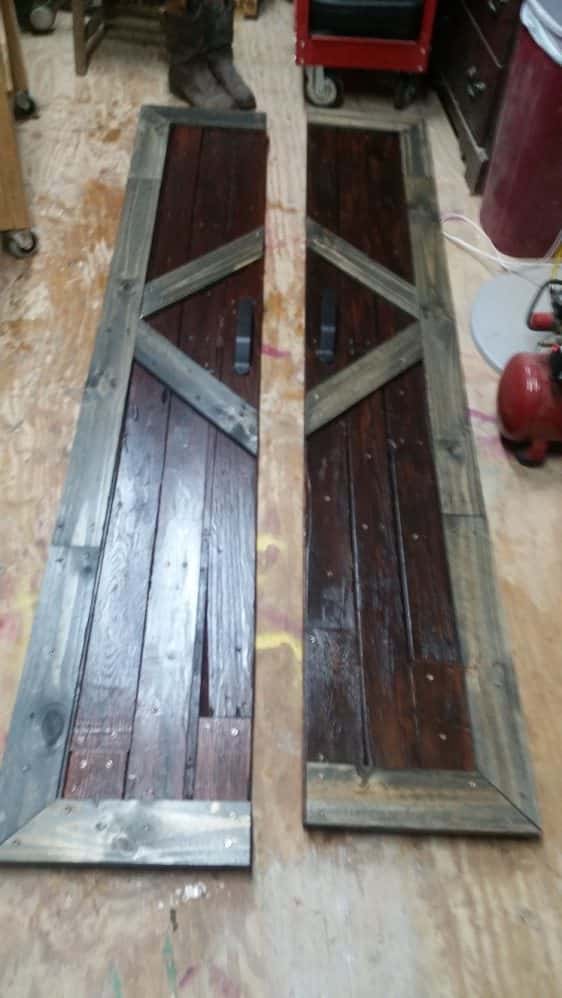
This is one of the doors, cut to the dimensions on my drawing. I found the two center points (both horizontal and vertical) and then figured out how big of a diamond shape I wanted by playing around with a few pieces of wood at first. Once I decided approximately how big of a diamond shape I wanted, I drew it out.


After I had done my drawing for the pattern, I cut the trim pieces and set them aside, leaving them in the shape/orientation they needed to have tight-fitting joints. I stored them flat (haha) and began installing boards onto the doors.



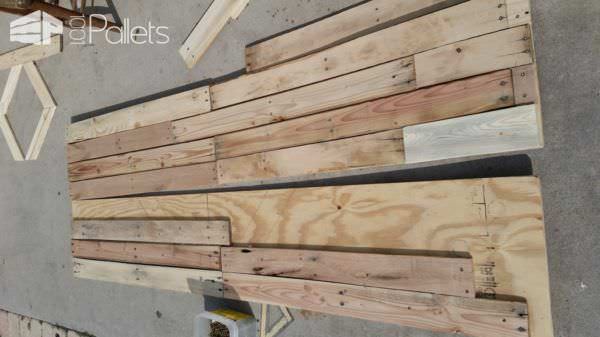
Add some color to your room décor – These Sliding Pallet Barn Doors feature two tones of interest
I put all the boards on the plywood and stained it. The stain was a mixture of a bunch of small amounts of stain from Pure Color, Inc. that I custom-blended until I liked the tone. However, I found out I had only mixed enough for one door! I thought of several expletives (and probably said some too). So, I started mixing once again, and this time not only did I match it, but I made enough to do both doors on both sides, as well as the entire door trim. I used a silvery-gray stain on the decorative trim, and after it was dry, I attached it to the doors (after straightening the warp out).
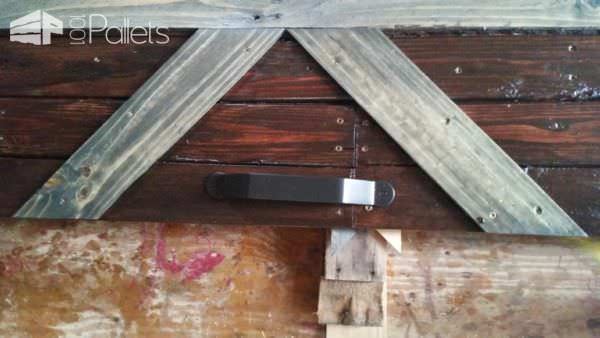

What if you do encounter problems with your DIY Pallet Project?
Adapt your project as I did on these warped Sliding Pallet Barn Doors! I realized the doors were still really warped after I finished staining them. I had hoped the moisture from the stain would help allow the wood to relax a bit. First, I stacked the doors upon scrap pallet blocks, but they didn’t sag back down. Next, I tried using the bricks. I left them two days this way, and it was still warped, but not nearly as much as before. Maybe it will work itself out. Finally, I flipped the doors over the other direction, stacked them on spare bricks, and weighted them down in the centers. It finally straightened the doors out. Just don’t give up! Finally, I attached the handles and varnished both doors with several coats of Minwax Satin Polyurethane Varnish.
My first attempt to straighten the doors. I’d stained the doors, but they were still curled like potato chips, so I put bricks on both ends to hold the doors flat. First, I left them like this for two days, but they still weren’t flat. I had to take the next step…

I finally resorted to flipping the doors over face-down and applying a bit of pressure – a stack of bricks. Then… I waited and checked them daily. Once they were bent back to approximately straight, I freed them from the brick torture. :)

Finishing out the door frame on my Sliding Pallet Barn Doors
I cut and fit the boards to the frame, stained them, and allowed them to dry. When they were dry, I installed them into the door frame to begin installing the sliding door kit. To install the door slider floor guide, I had to think fast. I couldn’t screw in the wood because it is some laminate floor on top of concrete. Instead, I used Power Grab Construction Adhesive and glued it down. There is a board within the door frame on the floor, and then in front of the door, I put another board. This is necessary because there has to be wood to screw in the floor guides for the doors. I made that piece the full width of the wall in that space.
Be willing to adapt on the fly! I had to improvise when I realized I had to have a bottom board for the bottom guide rail. I used Power Grab Heavy Duty Construction Adhesive, and it worked like a charm.


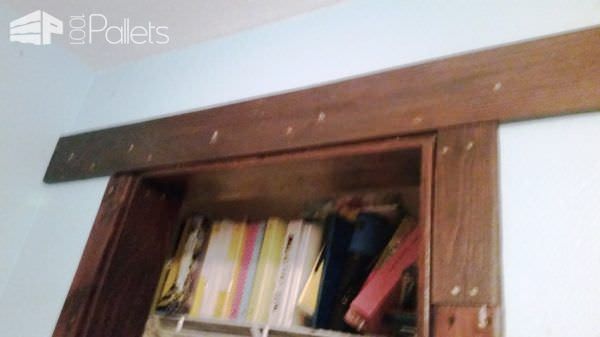
This is a view looking down at the floor. These little guides keep the doors from just flopping front-to-back when you grab the handle. They’re an important safety piece, so you don’t accidentally pull too hard and pull the door entirely off the top rail!

The door guides are those small black things in the lower corner of the door. They are just little bumpers to keep the doors from swinging out or pushing in. They have enough clearance to let the doors slide side-to-side easily.

Installing the hardware on my Sliding Pallet Doors – part 1:
Be sure to read the directions thoroughly, as you may need to modify the installation for your needs. I read them about four times to figure out how to put up the rail. I had to modify it due to the short length/width of the wall there at the door. The area is 54”, gap and the rail is 72”. We cut the rail using a reciprocating saw and sanded the sharp edges that were left. Also, that meant that the installation holes weren’t where I needed them. So, I clamped the steel rail in my drill press and drilled the holes for attaching it to the wall. Next, I sprayed it with flat black paint so there wouldn’t be silver showing where I drilled and sawed.
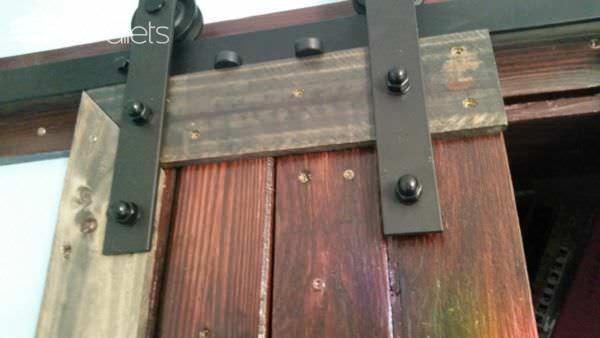


Here are the end bumpers on the top rail. The kit is actually pretty easy to assemble – but read the directions a couple of times first, so you have a good idea of the steps. Layout your hardware clearly somewhere that you will not spill it. :)

Installing the hardware on my Sliding Pallet Doors – part 2:
Some spaces make room for the rollers between the rail and the wall. It is all in the directions, but take a moment just to lay out all the hardware to get an idea of what you’re doing. Be sure and use a level to get the rail straight. The rails have stops that go onto the rail before attaching above the door opening. Be sure you don’t open the door right off of the rail. Then I had to attach the hardware to the tops of the doors. Measure, drill, bolt up…..but I had to adjust to being perfect. Remember, I am working with pallet wood, on top of the fact that getting anything squared out is next to impossible for me. Install the floor guides and the roller hardware. Finally, heft the doors up in place (protect your back!), and you’ve got an amazing set of sliding barn doors!


When have pallets ever looked better? I am pleased with this project. Also, I learned a few things, like adjusting the width and how to adapt a “one-size-fits-all” kit to really fit all of my needs.
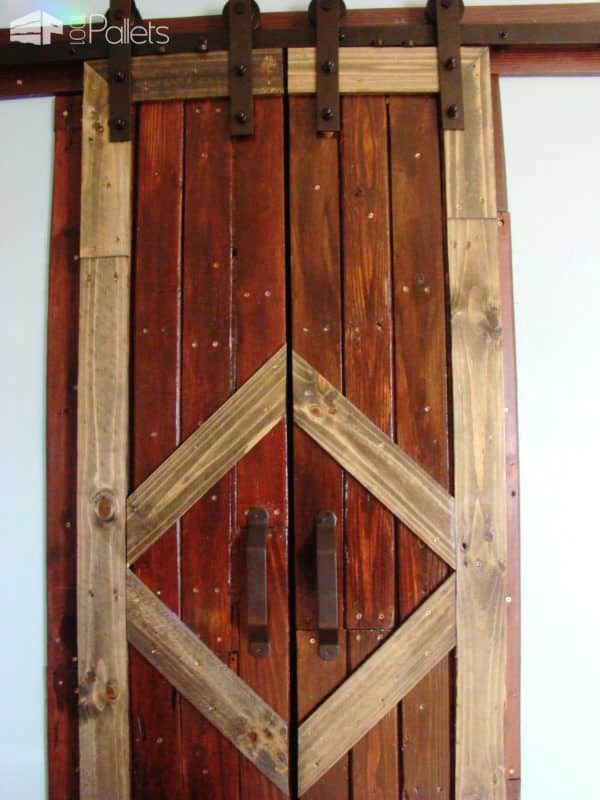
I love this Stanley Hardware Sliding Barn Door Kit. It is rustic but still is neat and beautiful. The oil-rubbed bronze color goes great with the brown and silvery stains I had on hand and against the color of the wall too.


You did an amazing job ,they look so good I want to hire you to do mine.
Well, if you live close enough or want to take a chance on shipping, I am game! Ha! Ha! They were really fun to do. And thank you!!
And the grey trim pictures are true to the color, but the others where the trim looks sort of blondish brown, that is with a different camera, and is not the true color. Just sayinzall. If you are going to do a tutorial, remember use the same camera to take the pictures on the way. Just an FYI, if you plan to do a tutorial, I have the attention span of a spazzed out two year old, so along the way, I take lots of pictures. That way, I am able to reconstruct the tutorial in my head from the… Read more »