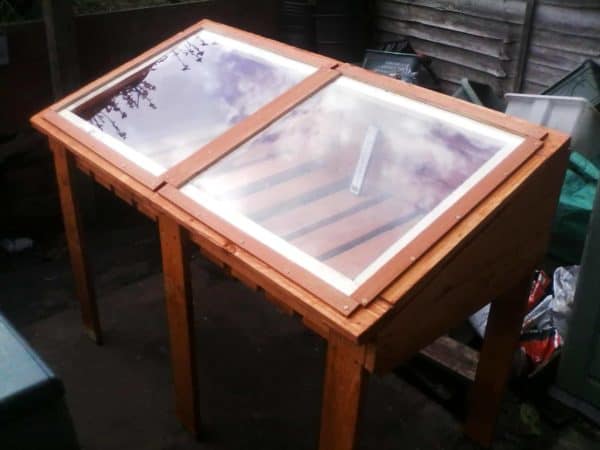
My project is a Raised Pallet Cold Frame. This idea is a transparent-roofed enclosure, built a little higher for comfortable gardening. It protects plants from excessive cold or wet environments. This project is a miniature greenhouse that extends your growing season!
Laugh in the face of the cold, wet weather and build a Pallet Cold Frame! Sprout seeds or extend your growing season!
I used pallets as the primary wood source but also used a small amount of plywood and two pieces of Perspex.
Supplies Needed:
- Perspex, Acrylic, or glass (upcycling old windows or French door frames is a great idea too!)
- Two to three pallets (depending on the size of your project)
- Three hinges
- Outdoor screws
- Nails
- Drill
- Screwdriver
- Sandpaper
- Tape measure
- Hammer
Make the Cold Frame any size you want to fit your gardening needs!
My frame’s dimensions are as follows:
- Length: 54″
- Depth front-to-back: 25″
- Rear height: 12″
- Front height: 4″
- Front legs: 32″
- Rear legs: 40″
- The base is 27″ off of the floor.
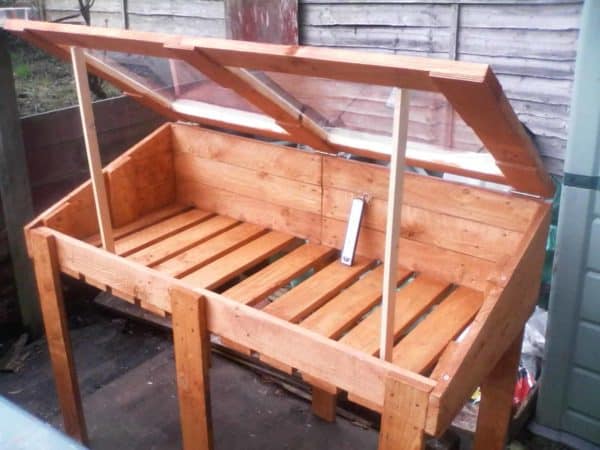
A Cold Frame is multi-purpose; sprout seeds or use it to keep plants warm in the colder months.
- First, assemble the back of the frame, with the two legs at the outer edges as a guide to how wide I wanted to make the structure. I used three planks for the height I wanted. This design reduced the amount of cutting and trimming.
- I fastened the planks to a central leg using screws in the center (All three legs are the same length).
- Attach the outer legs to the outer edges of the back of the frame. For larger planters, use more legs for stability.
- Make the front of the frame in the same manner, this time only using one set of planks. For deeper cold boxes, use more deck boards in the front.
- The legs and the planks at the front should match the lower planks you install at the sides. This method gives you the correct angle of the slope.
- Install the bottom row of planks in line with the lowest planks front and rear, and nail them to the front and rear planks to temporarily secure. Then, drill and screw them in place.
- Then upper rows on the side pieces need to be cut to the angle/size to form the slope you want.
- Screw the top of the two upper side pieces at the tapered front end to the plank below, then secure them at the sides by making two inner pieces of wood to stop them moving.
- Turn the whole frame upside down, then install the necessary amount of deck boards you want to create the bottom of the box. Wider gaps allow for faster cleaning but won’t insulate quite as well.
- Assemble the lid by using two top and two bottom planks of the same lengths. Fasten to three planks – one at either side and one in the middle. Next, assemble using screws and rectangular support pieces of plywood cut to size.
- Place two pieces of Perspex or Acrylic (or glass) over the holes. Fasten the Perspex in place by placing strips of plywood cut to size to form a frame around it. Drill the plywood at the edges so as not to drill through the Perspex, which might split if drilled.
- Finally, sand and paint or varnish as required. I used three 3″ hinges to hold the lid in place.
Never drilled Acrylic before? Don’t break it when making a Pallet Cold Frame.
Editor’s note: If you must drill the Perspex or Acrylic, do so by running your drill in reverse (as when removing screws). Apply gentle, even pressure and the heat of the drill bit will slowly melt a hole through the plastic. Support the corner and use scrap wood to drill into to prevent excess flexing.


