I decided to build this jewelry armoire after seeing numerous brilliant ideas for wall-mounted, low-profile jewelry chests and armoires, as well as those antique ones that mount on mirrors that had the pivot pedestals. I was motivated because I have three young cats who have decided that my jewelry is fun to play with. When I looked into the cost of purchasing one, I was surprised, particularly considering the quality (or lack thereof) of the materials. So, it was off to Pinterest for some inspiration. I saw numerous small ideas that I liked and incorporated here and there, but mostly I just decided to wing it. I had one of those cheap mirrors for the back of your door or hallway from the big discount centers (the ones that cost maybe 10 bucks with a cheap white frame), and didn’t want to make my armoire one of those that is hidden, as I don’t own any expensive or quality jewelry anyways. Plus, with the location I intended, a mirror would greatly increase the light in the little hallway. The mirror was 4 feet long and 1 foot wide, and the depth I could allot was no more than 4″, or the chest will be protruding into the entrance of the hallway.
The dimensions of my armoire are 60″H x 14″W x 3.5″D. I had some pine pallet pieces that were the right thickness and built the ordinary rectangular box out of it. The back of the cabinet was made from some leftover redwood tongue-and-groove siding that was in our 1920’s garden shed that we recently demolished. The 1×3″ pieces were too thick, so I simply made a temporary brace and fed the pieces through my band saw. These were all short, partially broken, or dry-rotted salvage bits that wouldn’t have been much good for much else, but worked beautifully for the back of the cabinet! I also made a point to try to find wood with character or interest, AND hopefully not much good for any of the other things I’m planning to build. :-D
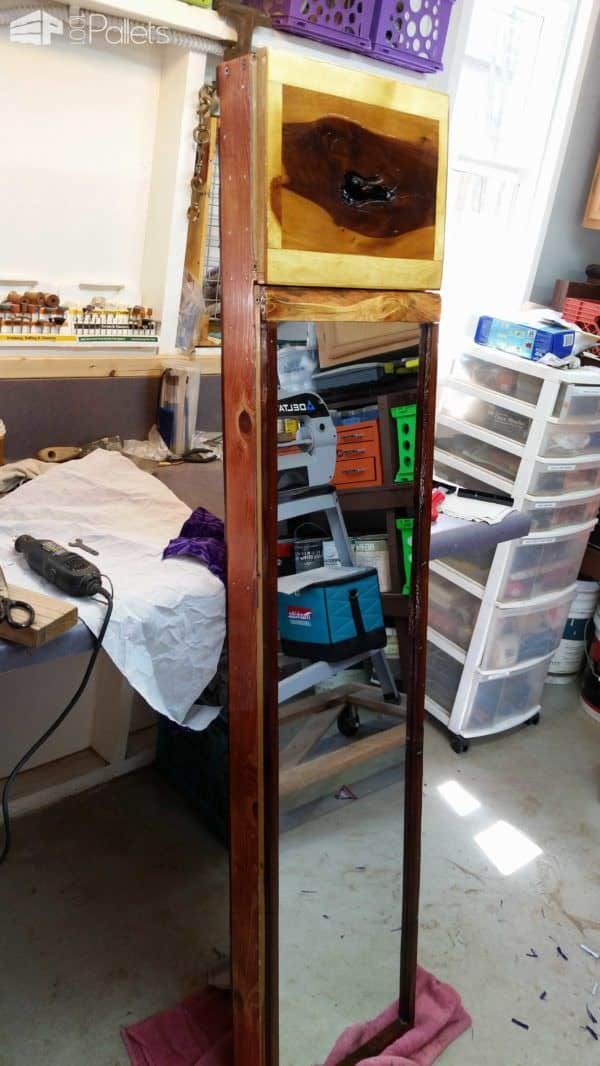
I wanted two doors – one just a little longer than the store-bought mirror, and then the smaller, upper door was made of a special piece of reclaimed redwood that was structurally unstable (cracked; unusual knothole defect) but was visually stunning. I’d been holding this piece of wood for several months; it’s not often that you get 14″ x 1″ 1920’s Cali. Redwood boards unless you’ve got a lot of extra $ to spend – but this was all reclaimed from the roof of our garden shed! This piece of redwood is the classic colors that people think of – golden wood with deep red rivers of color running through it. So I took the time to carefully wood-glue the cracks, then slowly sanded and sanded and sanded until it felt smooth and beautiful. I trimmed it out with pine for color contrast and then did a thin strip outline in a darker pine just because I thought it looked cool. All of the other woods besides the redwood were from pallets, btw.
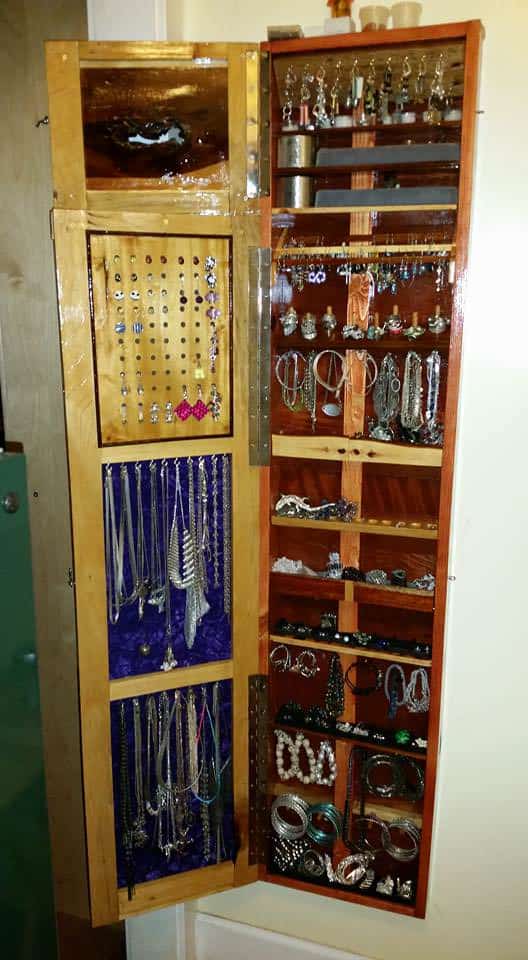
The second larger door was built out of pine, and I put a couple of cross braces for stability – and places to hang necklaces on the inside of the door. I mounted some scrap redwood strips that I routed down so they had an “L-shaped” channel where I could slide the mirror in without requiring any type of mounting. I attached the strips with simple nails. The top piece securing the mirror was just a freaky little bit of pallet wood that caught my eye but was not the strongest piece because of all of the weird knot holes, but I loved the color. It had gotten stained and had some beautiful mineralization along the grains, and I decided to have some fun and lightly stained this particular piece with a bit of light cherry color after staining it and saturating it with a “natural” color stain, so I could easily wipe off most of the cherry color. This ended up highlighting the weird gaining and knotholes as I intended, and then I sanded, sanded, sanded, not worrying that there were divots from where they were crudely cut to make the pallets in the first place. I liked that the wood had the character!
One of the panel sections in the larger door I used a bit of that laminate wood that is sometimes put on top of a pallet to keep electronics and such more protected. It was in good shape, so I cut it, drilled a bunch of holes with a table-top drill press for consistency (I used a simple piece of quad-ruled paper to give me easy consistency and poked it with a push pin after figuring what would work). I mounted it in place with some simple glazing points we had hanging around and sanded it very carefully. It has a couple of chip-outs and damage from being used as a pallet, but it doesn’t detract.
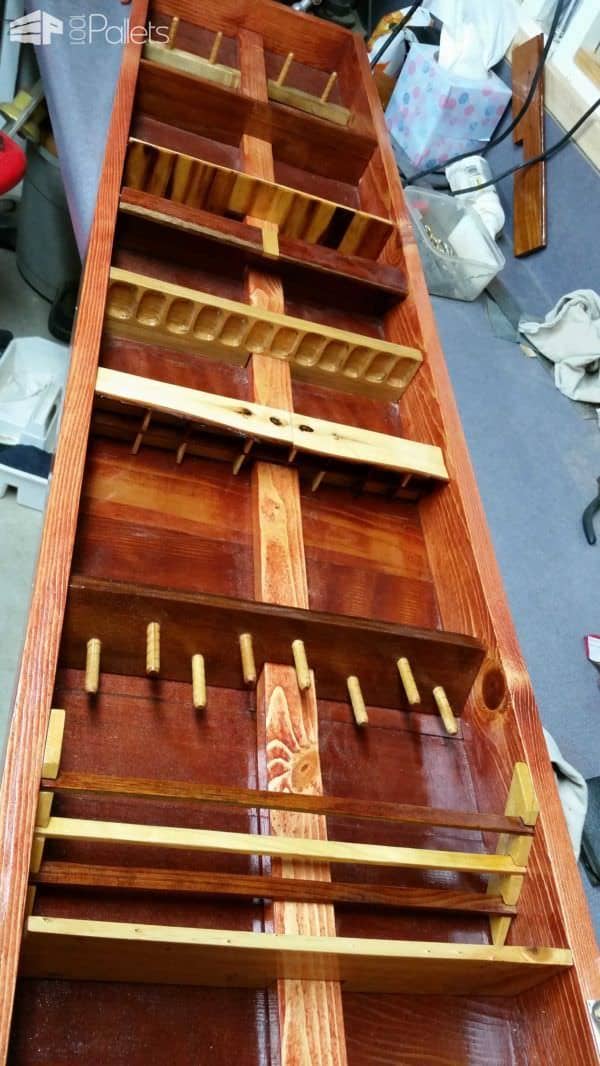
Then… on to the fun stuff – the shelves! Oh-my-goodness I had fun with this! I built shelves out of anything that was pretty in my bits-and-pieces bin where I toss all of my cuttings and trimmings. I used more redwood scraps, bits of the red oak that I’ve used on my locking storage bench, pine (with unusual knots that I loved), mineral-stained oak – honey oak (? not positive), and some light wood that may be something like birch? I’m not sure, but it was pallet wood, is all I can tell you. I utilized some ancient old wood dowels my husband has been saving for over 20 years and even used a pecan branch that fell in my yard last year. I didn’t know what color pecan was, so one weekend I was curious and sliced into it, I was stunned to see that it’s pine colored, but the knot holes are a deep chocolate-brown and very distinctive! I was in LOVE! I sliced two pieces off and left the bark intact, and butted them up against one another sort of like how you see people do NICE laminate work…. but on a cheap, home version! I also used some of that darker pine that I framed the smaller door and did a similar treatment – sliced it very thin and glued it onto a piece of pine, matching some patterns up; contrasting others just on what looked good to me.
I made some shelves flat; some have a bead on the front edge (the redwood – I used some of the tongues cut off from other projects to create a little decorative interest – as well as used them to frame out the laminate panel that I drilled a lot of holes in). Others have a face to them, so they’re able to hold some of my bulkier bracelets, etc. I made some shelves to sit in horizontally while angling others based on purpose (such as my earring holders and my ring holders – I wanted them slanted). I also built a three-tier french-loop earring holder rack (another idea pinched from Pinterest, haha). This was framed by pine and has red oak, redwood and pine slats.
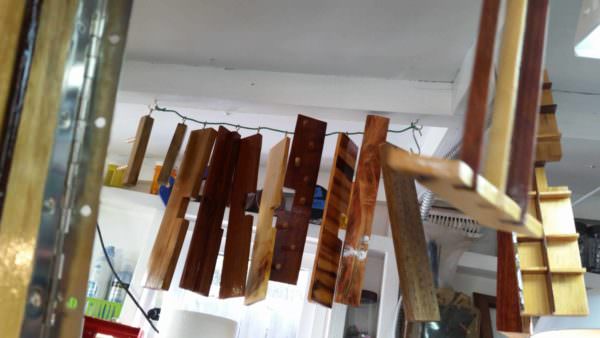
I sanded, sanded, sanded…. and sanded some more. I left a lot of the holes from nails, screws, etc., because I liked them. Some I filled because they were more torn up or just not good looking. I glued cracks. I sanded some more… Then I wiped everything down with a very lightly damp cloth and let them dry in the sun. I then started applying a total of 4 coats of oil-based polyurethane (It’s what I had; it was very old and needed to be used, and it’s not in an area that will get much natural light at all). I sanded with 600-grit sandpaper between each coat/cure. I did stain the cabinet with the light cherry stain, but it was because I wanted a darker backdrop for my jewelry, and to offset the pretty wood used on the doors. Everything else had been stained with a Minwax natural stain before the polyurethane.
Then I attached the shelves. Since none will have to support much weight at all, I attached most from the outside with small, shiny nails after pre-drilling. Some needed more support, so they received screws from the back. They’re spaced unevenly, as some have received cup hooks installed on the bottom sides to hold some smaller bracelets and bangles, while others will receive simple velvet jewelry display bins that I cut and trimmed to fit. I’m not going to glue them in place; it won’t be necessary – but it’ll allow me flexibility as my jewelry needs change. I also may want to see more of some shelves sometimes, as I tried to make it as beautiful to my eye as possible. I’ve got it set so that I can hold some of the loose stones I’ve received (or saved from broken jewelry) can be stored in some little clear boxes that I bought from a local swap meet. I even experimented and made one of the shelves with homemade dividers – wasn’t the greatest, but at least I tried.
The finishing touches:
- Installing the hinges – I recessed them so they wouldn’t hold the door further from the cabinet than necessary.
- Installing the mirror – it just slid in easily, then mounted the pine strip to hold it securely.
- Covering the ugly backside of the mirror with some purple crushed velvet material, so it’ll create a nice dark background for my necklaces. I also lined that one shelf that I did the homemade dividers with small pieces of scrap velvet.
Purchases: 20 small cup hooks (I had the rest of the larger cup hooks from my husband’s huge collection of bits of hardware). One new quart-sized can of oil-based polyurethane (of course I ran out part-way through the 3rd coat). Black and gray jewelry display dividers (from the local swap meet), and little plastic jars for storing broken bits of jewelry. So total cost is under 20 bucks!
Everything else was leftovers, scraps, or reclaimed material (including the crushed velvet from a project I did about 15 years ago for my niece).
Is it built “properly”? I wouldn’t know. I’m a nurse; not a carpenter. This is just my hobby, and it’s fun sharing to encouraging others to give it a try – even just to be gentle on your wallet.



Please make pallet plans and ideas available to me.