There is one thing that you can’t really skip when working on a pallet project or any wood project, it’s the terrible sanding time! :) If you want to achieve excellent results, you’ll need at a point to sand your wood or pallet and, this is even truer if you are working with repurposed pallets, as you’ll face raw wood that needs sanding for a nice looking & touching. But don’t worry, sanding is not very difficult, and you just need to know what to use and how to use it. Let’s see some useful wood sanding tips.
If you are there, it’s surely because you want to work with used pallets for your next projects. Used pallets are made of rough wooden boards with splinters and all kinds of default or marks on them. You’ll need to prepare those planks for your projects, and at some point, you’ll have to sand them to have a smooth touch and to make them ready for the finishing such as paint, wood stain or even varnish.
Let’s check what are the tools and materials needed for sanding and then the process itself.
The Sanding Tools
First, you have to choose which method you’re going to use (it’s not a hard decision): will you do the wood sanding manually or will you use a power tool?
If you choose the manual wood sanding method, you can use a piece of sandpaper wrapped around a wooden block or a sanding block or a sanding sponge or even by using your hand only.

Manual wood sanding is good if you don’t have too many wood planks to sand or for little finishing touches. For bigger projects with a lot of wood or pallet planks, you’d want to use an electric sander or you’ll lose all your energy in the sanding process ;). A power sander will make the work a lot easier and quicker. You can find a lot of power sander types on the market, but the main which are suited for any kind of DIY woodworking projects are:
- Orbital Sander
- Eccentric or Random Orbital Sander
- Belt Sander
Check-out the video below explaining the different kinds of sanders, you can use for your woodworking projects.
Sanding pallets, what is the best sander?
They’re not a straight answer to this question or maybe yes there is one answer: there isn’t a perfect sander for sanding pallets. As a woodworker, my favorite brand is Makita but it’s also the most expensive one… but good tools help for good works! All the woodworkers, hobbyists or DIY-ers have their own favorite brands and everyone will swear by them.
So, could we told you which sander to use? It really depends on the tasks required for your project, different tasks require different sanders. For example, to remove the material or shape a plank, you’ll need a different sander than for smoothing and sanding between coats of stains.
But, if you’re a beginner or if you don’t have a huge budget, you’ll have to compromise as you’ll not be able to afford many types of sanders. In the market, you can find a lot of correct sanders at a low price that could do the job for small to medium woodworking projects. They will not last you years of sanding but they could be sufficient for small to medium works.
Tips:
If you don’t have a big budget, this will help you to choose between the different types of sanders:
- Belt sanders are powerful and will remove materials faster but the downside is that they are a lot more difficult to control.

- Orbital sanders are more recommended for the finishing.
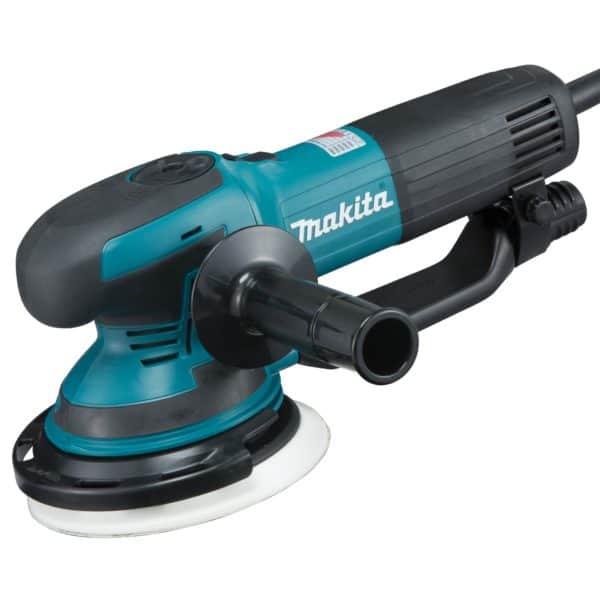
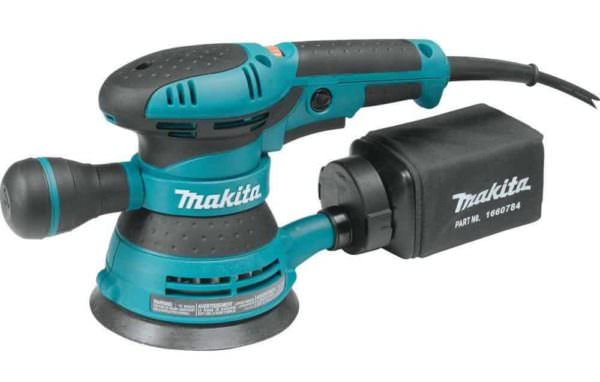
- Random Orbit Sanders are more versatile and will help you to sand wood faster than with an Orbital sander.
The Best Sanders For Beginners
These are our top 3 best sanders for working with pallets. They can all be found at Amazon for a correct price.
Belt Sanders:
| # | Preview | Product | Rating | Price | |
|---|---|---|---|---|---|
| 1 |
|
WEN 6321 7-Amp 3 in. x 21 in. Corded Belt Sander with Dust Bag , Black | 2,712 Reviews |
$39.99 |
Shop Now |
| 2 |
|
DEWALT 20V MAX* Belt Sander, Cordless, Brushless, Tool Only (DCW220B) | 344 Reviews |
$223.96 |
Shop Now |
| 3 |
|
WEN 6502T 4.3-Amp 4 x 36 in. Belt and 6 in. Disc Sander with Cast Iron Base | 6,204 Reviews |
$131.13
$111.68 |
Shop Now |
Orbit Sanders:
| # | Preview | Product | Rating | Price | |
|---|---|---|---|---|---|
| 1 |
|
DEWALT Random Orbit Sander, Variable Speed, 5-Inch (DWE6423) | 2,601 Reviews |
$99.01
$84.00 |
Shop Now |
| 2 |
|
SKIL 5” Random Orbital Sander with Cyclonic Dust Box & 3pc Sanding Sheet - SR211601, Multicolor | 4,388 Reviews |
|
Shop Now |
| 3 |
|
BLACK+DECKER Orbital Sander, 5 Inch, 2.0 Amp, 12000 OPM, Corded, 1 Sandpaper Sheet and Dust Bag... | 14,964 Reviews |
$39.99
$36.68 |
Shop Now |
Sanding Paper
Now that you have chosen your sanding method (manual or powered), you’ll need to choose which sanding paper to use. In both cases, you’ll need to choose the type and grit of the sandpaper.

Editor Note:
Do you know that the first use of sandpaper was found during the 13th century in China? How did they do? They crushed shells, seeds, and sand and then bonded them to a parchment using natural gum. Sandpaper was originally known as a glass paper, as it was covered in glass particles, not sand.
Types of Sandpaper
In today’s market, they are many types of sandpaper available, with variation in the backing paper, the material used for the grits, the grit size, and the bond.
Materials
What are the materials used on sandpaper? The most common materials used in sandpaper for working with wood are garnet and aluminum oxide.
Shape
If you’re using an electric sander, the shape of the sanding paper sheets will depend on the sander you have. You need to take care to buy sandpaper that is compatible with your powered sander.
Grits
Sandpaper is graded on the number of abrasive material per square inch. A higher number means finer grit, lower number coarser grit. It usually goes like this:
- P12 – P36: extra coarse usually used for hardwood flooring initial sanding, very fast removal of material
- P40 – P50: coarse
- P60 – P80: medium i.e. for gentle removing of varnish
- P100 – P120: fine, used for cleaning plaster and water stains from wood
- P150 – P220: very fine sanding of bare wood
How to chose your grit? It will depend first on the kind of wood planks you have (raw, recycled, good condition or not…), the final effect you want to achieve and the kind of finishing material you want to apply e.g. varnish, oil, stain, paint…
To remove materials from your wood faster (deep scratches, nicks, dents…), you’ll have to use a coarser grit. Once this first sanding is done, you’ll need to move to a finer grit to smooth out the scratches made by the previous sanding with the coarser grit. We recommend to not skip a grit if you want to achieve a really swirl-free smooth finish.
When working with pallet wood, which is a specific wood, maybe you’ll want to keep an upcycled, rustic and aged look, so using a very fine sanding would not be needed but again it really depends on which effect or touch you want your project to have.
Our recommendation: try by yourself, use different grits and see which one suits best your project. Also use different varnishes, stains, paints, and finishes and see which is the best grit you need. Always test, it’s by testing that we learn! :)
| # | Preview | Product | Rating | Price | |
|---|---|---|---|---|---|
| 1 |
|
HSYMQ 24PCS Sand Paper Variety Pack Sandpaper 12 Grits Assorted for Wood Metal Sanding, Wet Dry... | 9,066 Reviews |
$5.99 |
Shop Now |
| 2 |
|
Sanding Sponge, 60 80 120 220 Coarse Medium Fine Grit Sanding Block, Sander Sponges for Drywall... | 3,530 Reviews |
$8.52 |
Shop Now |
| 3 |
|
Bates- Sandpaper, 18 Pack, 12 Grits, 120 to 3000 Assorted Grit, Sandpaper Assortment, Sand Paper,... | 2,024 Reviews |
$7.99
$5.49 |
Shop Now |
Summary
As a summary of this little article on the different types of sanders & sandpapers, we recommend to sand with the grain of the wood when using a belt sander. Don’t worry about that if using random orbital except with when finishing off.
Choose your sandpaper grits based on:
- The type of wooden planks you have: used, rough or new.
- The final effect and type of finish i.e. varnish, paint, the stain you want for your project.
Depending on the finish you want to apply to your wood, you’ll need to chose carefully your sandpaper grit. For example, oil finishes leave virtually no film and you’ll feel the wood. With a film finish like varnish, the finish needs to be smooth, not the wood.
To achieve the desired smoothness, you should use several grits. Start with grit P40/P60 then medium P80/P120 and finish with a higher grit like P100/P120 or even higher with a P150/P180 grit.
Tips: you can sand between coats to achieve a more depth finish.
Remember to always wipe off the wood dust with a cloth after sanding and before applying stain, paint or varnish. And, as always with woodworking projects, be safe and use masks, goggles, gloves, and noise-canceling headphones. Check out our Workshop Safety: Pallet Woodworking Safety Tips to learn more about how to be safe for your next woodworking project.




Loved this! very informative!
If using a belt sander, at what point do you recommend sanding? After the pallets have been deconstructed? If so, what do you recommend for holding the wood in place while you sand?
Thank you for your professional advice. Interesting fact about the first sanding material used, I believe it to have been shark skin.