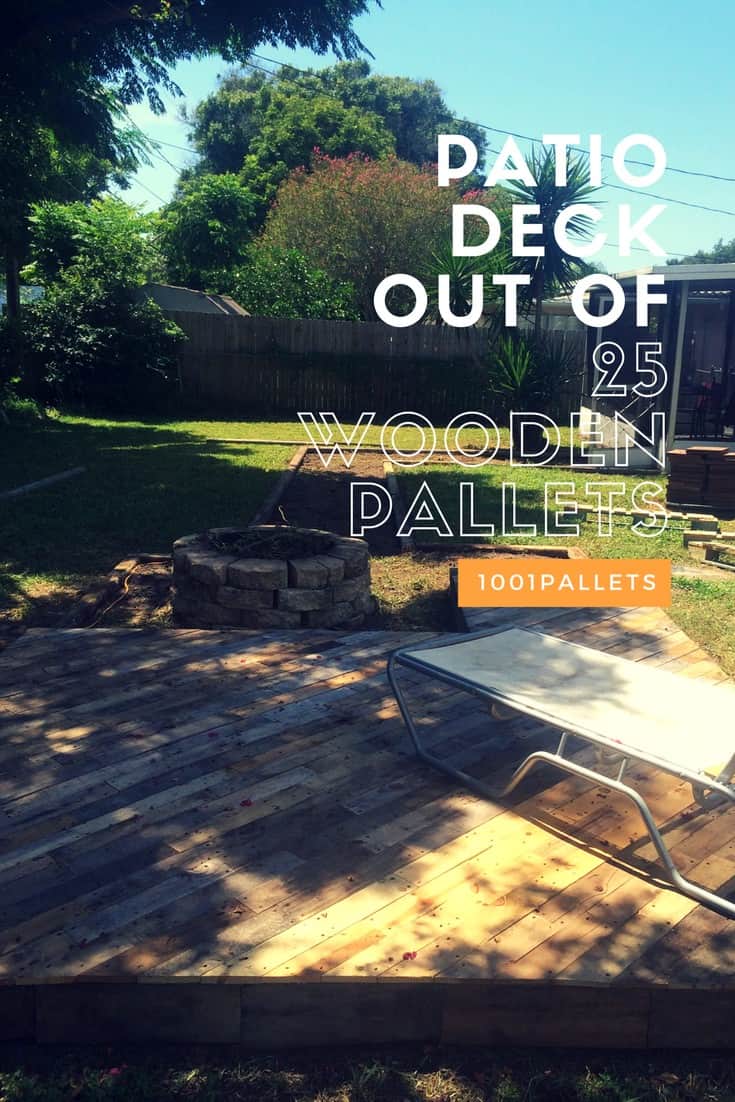
We built this beautiful pallet deck in 2 working days (including refreshment and bbq breaks). Our budget was 150 € (about 168$), not counting any tool purchases.
To make this Beautiful Pallet Deck we used the following tools and supplies:
- geotextile sail
- brass screws (150 env.)
- 15 Euro pallets without (holes)
- protectant wood oil
- jigsaw
- drill
- screwdriver
- sandpaper in 60 and 120 grit
- a sander
- brushes/rollers for the oil
Create a great outdoor living space – and start it with an idea like this Beautiful Pallet Deck!
We cut three pallets to adjust the length to fit in the designated space of our backyard. Next, we installed the geotextile product and began installing the pallets. We placed, aligned and leveled them. We inserted the battens, then pre-drilled the pallets. Then we attached the pallets together with screws. We used trim boards to fill the gaps between the deck boards to create a solid deck surface. We sanded the whole deck surface twice and vacuumed the surface well. The oil was applied. At first, it looked quite orange, but over time the patina color is now closer to teak. The edges are also made with leftover deck boards.
The party will be at your house with a Beautiful Pallet Deck like this one!
2 jours de travail à 3 (compris les pauses rafraîchissement et bbq). Bugdet max. 150€ (sans les outils). Pour réaliser la terrasse nous avons eu besoin de : voile géotextile, vis laiton(150 env.), de 15 palettes (format type europe) sans (trous de noeux), de tasseaux en sapins (sans trous de noeux), d’un saturateur bois pour terrasse. Pour les outillages: scie sauteuse, une perceuse/visseuse, abrasifs en 60 et en 120, une ponceuse, necessaire à peinture…
Nous avons découpé 3 palettes afin d’ajuster la longueur à l’espace défini préalablement nivellé. Une fois les palettes alignées (et de niveau…) sur le geotextile. Nous avons inséré les tasseaux si besoin nous les avons redécoupés. Puis nous les avons (pré)percés puis vissés. L’ensemble à été poncé en 2 fois. Nettoyé. Puis traité. Au départ l’aspect paraît très orange mais avec le temps la couleur se patine (aujourd’hui couleur teck). Les bordures sont faites aussi avec le reste de planches des palettes découpées.


Great job! Now you need some Pallet Terrace Furniture! Turn old satellite dishes into excellent Patio Covers!


Luis Sampaio Arnaldo olha aqui a nossa ideia!
Eh vi tu as vu ?
Antoine Martinez