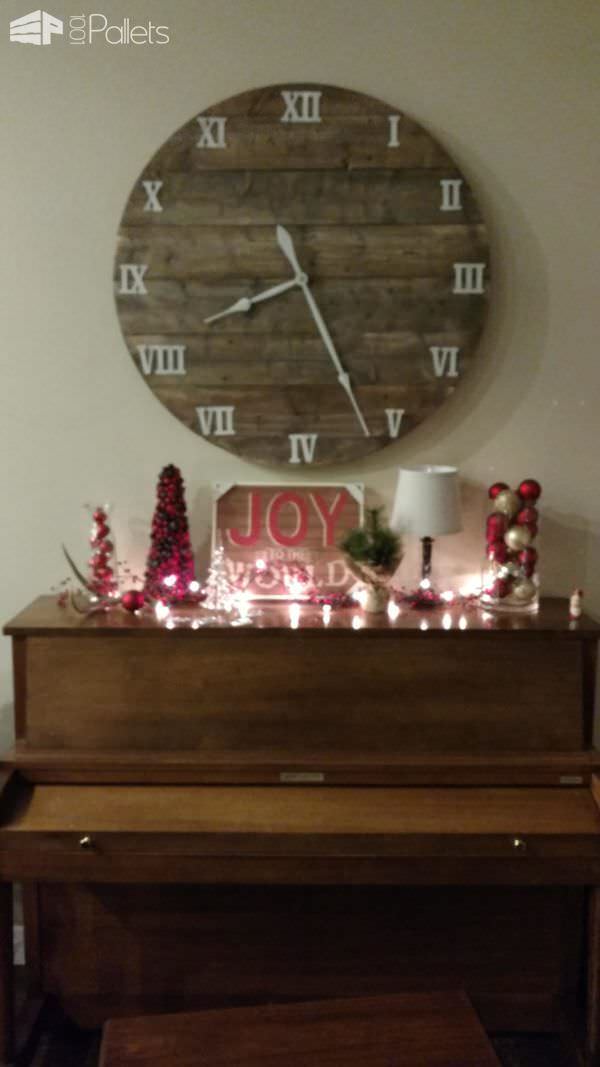
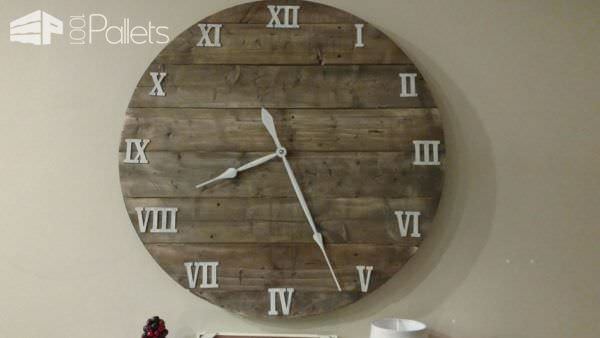
I built this budget-friendly large Pallet Farmhouse Clock after weeks of research and hours of YouTube videos. This fun build was done to complete a project started by my lovely wife.
Gather your supplies and make a Pallet Farmhouse Clock for your indoor or outdoor decor!
- Dismantle two pallets. I enlisted the help of my 11-year-old to introduce my kid to basic shop techniques while laying out the clock face. Unfortunately, the pallets I found had thin deck boards that warped after gluing and drying. We opted to purchase lumber at the store to complete the project. However, if you use thicker deck boards, this is still an excellent pallet project! We headed to the lumber yard in search of 2x4x8 stock material.
- I set up my son on our miter saw, and he cut all the boards to 48″ lengths. We now had a 44″ x 48″ rectangle that would become the face of our clock. We glued and clamped it all together, and allowed it to dry.
- Next, we measured out the wood for the center by making an X in the middle (this would be out center point for both the line and pencil and our router circle jig).
- We used a 20″ piece of twine attached to a pencil and made a rough circle on our Pallet Farmhouse Clock face. We used a jigsaw to cut out all the pieces, keeping the scraps for stain testing. To add extra strength, we fastened the wood together with a Kreg Pocket Hole Jig system.
- I used a router with a Freud 1/2″ (Dia.) Bearing Flush Trim Bit with 1/2″ Shank to clean up the edges. I attached it to a circle jig to ensure the clock was round. We employed out toddlers to rough up the face of the clock. There’s nothing like a 2 and 4-year old with hammers and other blunt objects to get the job done. To say the least, they did a great job.
- Now it was time to build the housing for the clock mechanism and the French cleat. For both of these, I used our Trim Router and sunk an 1 1/8″ square hole for the mechanism (use the template from your clock mechanism kit). I sunk a 1″ deep by 2″X30″ slot in the back. This slot is where the French cleat would sit.
- Finally, we built the cleat and attached one side onto the clock and one side to the wall. We did a quick dry fit and removed it to stain it. If you aren’t comfortable making a French cleat system, you can purchase French Cleat Picture Hangers.
- Now remember that my pallet wood was a complete fail, so I needed to stain the wood to look like a pallet. The rustic look ensured a happy wife.
We achieved this by cutting up a steel wool pad and soaking it for two days in vinegar. We strained the liquid through a coffee filter to ensure no metal would end up on the clock. Then we brewed some strong black tea, and while it was still hot, we applied a coat to the lumber. Once dry we applied a heavy coat of the vinegar stain and let it sit overnight. - A quick sand for distressing and it was time to put it all together.
- My clock numbers and hands came black so we quickly painter them white, just to make them pop. Finally, we used hot glue to add the numbers, and the project was complete.
Here are 40 Pallet Organization Ideas for you! Find easy-to-do tips & tricks for upcycling old furniture!




Great idea. I have made several clocks of barn wood. You need to pay attention to which high torque
clock mechanism to use, they are not created equal. I found that those that use a “C” battery work best. Tinkering with the large hands to make sure that do not snag on each other is important. Final adjustment must be made once the clock is hung for display.
If you could swap 4 and 6, it would be just perfect ;) 4 is IV and 6 is VI. First I thought it was one of those slow clocks.
Is this a new type of clock where 4 and 6 are switched? 4 is IV and 6 is VI ?
Love it
Sylvia Shaw i thought you may like this