I needed a cabinet in the kitchen because we have a very small house and I have a lot of stuff, evidently…. So, I decided to make a Bright Colorful Pallet Kitchen Cabinet. I made one like this one two years ago but used regular wood and fence planks. It was okay, but I wanted to do more.

My first cabinet.
I made this first cabinet prior to my realization that there is an amazing amount of free wood of all different kinds available in pallets. And since I have virtually a small lumber yard now, I thought it would be a wonderful choice. I also had a bunch of leftover tile from the last cabinet I made, so decided to use that as the top of the cabinet, which is kind of like a counter top.
Bright Colorful Pallet Kitchen Cabinet:
This cabinet is 24″ deep and 53 inches wide and 42 inches tall at the counter top part. I think this is just how the lengths of the pallet boards turned out, or close to it, and as long as I wanted to make the cabinet. So I cut out the frame boards and started screwing them together. I already had lots of pallets torn down, so don’t have any idea how many this took, but probably not more than 2. I used the 2×4 pallet stringers for the framing, and I screwed it together mostly with 3” #9 screws. In high-stress areas, and if the wood was thick enough I used 3.5” #10 screws with Torx heads. Whenever I use the Phillips head screws, I seem to twist off the heads. Not good.
Framing:
I built the base portion of the frame down, then the first uprights, and then installed the first shelf. To me, it is easier this way, and less stuff in the way if you put shelves in as you build. This was the part of a pallet that had this weird solid piece instead of slats. It was this white wood laminated over this really pretty dark wood, so I scraped and sanded as much of the white off as I could and varnished as I went along also, less problem with drips and stuff.
Bright Colorful Pallet Kitchen Cabinet – And the shelves go in for pallet storage:
I installed another shelf at the height I wanted, considering what I wanted to put on the bottom shelf (mixer, pressure cooker, etc.). The next shelf would hold smaller stuff, and so on. Also, I have to bring it inside before putting tile on it, due to weight. Plus, I didn’t want it to smell up the house with the oil-based Polyurethane varnish. I used Satin finish varnish. I could have used the water based Poly since I am keeping this cabinet inside, but I just wanted to seal everything up with the extra-durable Polyurethane.
Topping the shelving unit:
After completing the shelves, I put some MDF on the top for the tile base. I just had it laying around, so I used it. Next, I took the tiles and placed them in the pattern I wanted, just dry-fitting them. This took me a while. Then I glued them down with Power Grab construction adhesive using a caulking gun. That had to dry overnight. Then I grouted the tile. That had to dry overnight also. I hate doing the grout because it seems endless when you start wiping the excess off with the big sponge. Let it dry!
Bright Colorful Pallet Kitchen Cabinet – Light up the cabinet and the kitchen!
I added little LED strip lights under each shelf and attached a power strip to the leg on the inside to use for an on/off switch. They have stick on ones. I got the LED strips from 1000Bulbs.com, and they have all the stuff you could want to make the lighting in any situation. So it is way easier to do this before putting the front boards and doors and the planks on the sides on the piece.
Prepping exterior trim:
In between everything else, I planed down some fence planks. The fence planks are those rough, cheap ones with the dog-eared tops. I stained some with bright wood dye and some with a stain from Pure Color, Inc. The ones from Pure Color are really nice, don’t smell at all, are water soluble and water clean-up. You can adjust the brightness of the colors and blend them before applying, during, or after they dry, and come up with really cool combinations. Or you can use them just plain like I did with the Lemon color on the doors. For most of the colors, I planed the wood, applied the stain, planed it again lightly, and varnished it. I made the planks all 60” across the back of the cabinet and then staggered them down the sides to a couple of inches above where the tile is at the front.
Bright Colorful Pallet Kitchen Cabinet – Trimming it out:
Next, I used pallet boards to trim out the front to frame out the place for the doors. This allowed me to use cheap hinges because they lay flat. This is always the difficult part for me because I have real problems keeping stuff square. I cut pallet wood at right angles to make the doors, and I put little brace metal pieces on the back of the doors as well as putting screws in at the corners. Putting those brackets kept it all together so I could put the doors together fairly square. Then I put the hinges on the doors and then put them into the hole made by the pallet boards screwed onto the front of the cabinet. I screwed them into the cabinet with a shim underneath the doors, so they will swing freely when the hinges are screwed in.

The bottom portion of the frame, bottom shelf material partially installed, and two of the vertical portions installed. This 2×4″s are all pallet stringers.

Another view of the frame. I filled in the gaps of the forklift arches with scrap lumber, so the shelf was evenly supported. The frame is just butt-joined with Torx-head screws.

Torx screws.

The shelves go in. I used pallet deck boards to create the shelves.

I used a layer of MDF to provide a stable, level surface for the tile. Then I dry fit them, then installed them with PowerGrab construction adhesive.

I used a dark grout. Here’s the table top with the grout fully installed.

LED lighting installed on the inside of the cabinet.

The lights are installed!

Here are some of the planks before attaching them to the cabinet with #8 2” Torx drive screws. I screwed them on at the places where the 2x4s were in the frame.
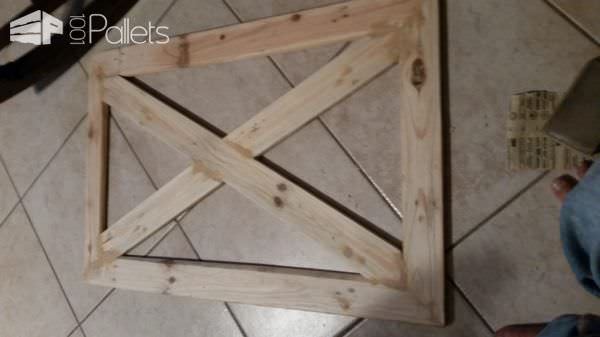
Notice how I had to put wood putty in the corners to make it go together properly? I didn’t allow for the thickness of the saw blade. And the brackets…..they make it all better for me.
Lovely work! Now, it’s game time! Check out this Cornhole Board game!


<3 it! Great use of various upcycled products, too. This could be adapted to anyone's personal style (and stockpile of remnants). Brilliant idea!
Hey Granny K – you ROCKED this. I’ve known for a while. <3
Thank you, Heather!!! This one was fun. I am going to have to build the quail flight pen here real quick for the older ones. Figuring out dimensions according to how long most of my pallet support sized boards are. Ha! Always searching for a cheaper way to do stuff.