What if I told you that you could paint your pallet projects with FLOUR PAINT? Would you think I’ve lost my mind? I may have, but that’s a different story altogether. Follow me, and I’ll explain…
Flour Paint – An old recipe
YES! There is a long-lasting, ecologically friendlier, and durable paint for vertical wood surfaces. Save money and make it at home! Although it sounds crazy, it IS and has origins in Sweden.
This old recipe is sometimes called “Swedish paint,” but it is also known as “wheat paint,” “ochre paint,” and more.

The primary ingredients include water, clear dish soap, linseed oil, powdered pigments, iron sulfate (a common food additive), and flour. It has great results, is low-maintenance, and lasts up to TEN years! Everything is available through sites like amazon.com, of course, but you can get the supplies between your local art supply and hardware stores.
Flour Paint – A heavy-metal history
Swedish Paint is well-known for a very distinctive color component called Falu red. This pigment came from the Great Copper Mountain of Falun (in Sweden). It has high levels of copper, zinc, and lead, which makes the paint very durable, bactericidal, and antifungal… but if you didn’t pay attention to that last ingredient – also made it toxic!
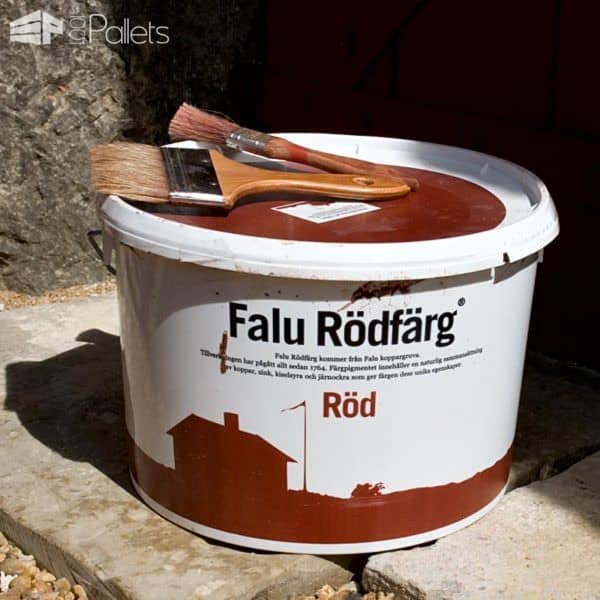
So, to make it safer, Flour Paint is colored with natural pigments, such as ochre to replace the heavy-metal-laden Falu Red. However, you’re not stuck with only one color. It can be colored with iron oxides, and many other pigments to give you more than just one or two tones. The most common natural pigments are going to be in the earth-tone range (ranging from yellows, browns, reds to dark charcoals and black tones).

The revitalization of using Flour Paint must be credited to the Association Terre et Couleur, which is a French, non-profit organization that promotes the use of natural pigments, including ochre and other earth-toned pigments. They’ve been actively supporting this alternative to industrial-made paints since 1995.
Why make your own Flour Paint?
Manufacturers have been making paint commercially available for years! True, but I guess the more important question would be, “What’s in that industrial paint?” Do YOU know what you’re using when you’re painting a fence, barn, or garage? Wouldn’t you want to try something with a tried-and-true track record – that can last ten years? And the bonus is that you can actually pronounce all of the ingredients AND know what they are!
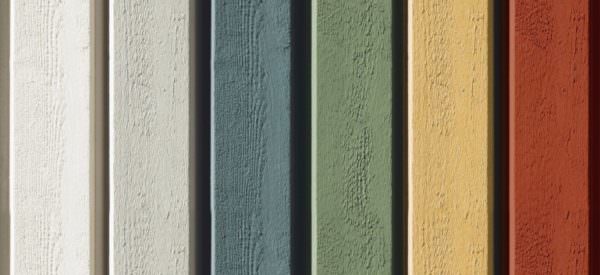
Flour Paint – a healthier alternative
Flour Paint is a viable alternative for those who have health and/or environmental concerns. Same for anyone worried about using industrial paints. It’s cheaper, and it doesn’t emit any VOCs (Volatile Organic Compounds).
Flour Paint is even a good alternative to the “ecological” paints that are now commercially made. Particularly when we’re charged MORE for an ecologically friendlier product with simpler ingredients. It seems counterintuitive, doesn’t it? If it’s better ecologically, wouldn’t companies be willing to sacrifice a bit of their bottom line for the greater good? What do YOU think?

The Benefits of Flour Paint
- Flour Paint also offers excellent UV protection. Especially when you use a pigment like ochre because it’s very opaque. If light can’t get through, it won’t gray the wood.
- Once you have the surface painted, you don’t have to do a lot to it.
- You can clean it with soapy water.
- If you want to freshen up the color with another coat, you don’t have to do any prep – NO stripping, no sanding, etc. You only have to clean it and repaint it.
- It’s ideal for exterior surfaces! Yup – IDEAL.
- Flour Paint LOVES softwoods – and will work beautifully with pine!
That alone should get your attention! But there’s a catch. Isn’t there always? There are a few to be aware of when making your own Flour Paint:
- You make it yourself, and it needs to be cooked for about an hour. Since it’s made from simple ingredients and we’re not adding a lot of stabilizers and preservatives to it, flour paint won’t store as long as industrial paints. Eventually, flour and water start fermenting. If it’s warmer, the shelf life is shorter. If you store it in a cool room in a sealed container, you may be able to store it up for six months, but results will vary.
- To get the long-term durability, you’ll need to recoat it in about a year. But again, you only have to wash the vertical surface, get the big chunks off, let it dry, and then slap on another coat. No, another prep is needed. After that, you’re good to go for up to 10 years. Sorry, Southern part of U.S.A. (Southern portions of CA, AZ, TX, LA, FL, etc.) – you may be on the lower end of the recoating time, but still – eight years?!? That’s awesome!

- It’s not recommended for horizontal (flat) surfaces like benches, chairs, decks, etc., as it’ll wash out and wear too quickly. It’s best for fences, vertical borders/planters, etc. Any surface where the water won’t pool on it.
- Only use Flour Paint on wood. It can be old, new, or somewhere in between.
- It needs to be dry, brushed or sanded, dusted and stripped of any previous paint or varnish that will prevent the new paint to penetrate the wood fibers. You can still leave the wood “rustic,” which we Pallet Crafters love, but you’ve got to remove previous coatings.
- You cannot use it on drywall or metal. It just won’t work right.
- If you use it on some woods like oak (the darker woods), the wood may darken or blacken over time. This isn’t a problem if you’re going for a deeper tone anyways, but if you choose a light earth tone in the yellow range, it’ll change and won’t look as great over time. This is because of the tannins in the wood.

Wait… May flour paint darken or blacken oak? EW!
Now don’t riot, Pallet Crafters! I understand that a lot of pallets are oak. But not all of them by a large measure. How many pine pallets do you find? Pine is one of the most popular materials used in the U.S. What about poplar, ash, or maple? There are more types, but those are some of the popular ones in the U.S.
Flour Paint – a simple recipe – give it a try!
Here are the ingredients you’ll need to make 10 liters (+/- 2.5 gals.) of Flour Paint, which will cover approximately 35 square meters (375 square feet) per coat. You can adjust the quantity according to your needs. Measurements are provided in both metric and US systems for your convenience:
- 8 liters of Water (8.5 qt)
- 650g of White Flour (23 oz.)
- 2.5kg of earth pigments or iron oxides (5.5 lbs.) (FYI both artdec.ca and naturalearthpigments.com sell natural pigments by the pound – about 12 to 50 dollars /pound on average)
- 250g of Iron Sulfate (9 oz.)
- 1 liter of Double-Boiled Linseed Oil (1 qt)
- 100ml of black soap or colorless dishwashing soap (3.4 Fl.oz.)
| # | Preview | Product | Rating | Price | |
|---|---|---|---|---|---|
| 1 |
|
Book of Earth: A Guide to Ochre, Pigment, and Raw Color | 62 Reviews |
$35.00
$28.83 |
Shop Now |
| 2 |
|
colorare The EARTH TONE Collection - 3 Pack Natural Mineral Pigment Pack (150 ml): Light Yellow... |
$29.95 |
Shop Now | |
| 3 |
|
Earth Dry Pigment Set | 2 Reviews | $48.00 | Shop Now |
| # | Preview | Product | Rating | Price | |
|---|---|---|---|---|---|
| 1 |
|
Sunnyside Corporation 87332 Pure Raw Linseed Oil, Quart | 4,555 Reviews |
$19.83 |
Shop Now |
| 2 |
|
Winsor & Newton Refined Linseed Oil, 75ml (2.5oz) Bottle | 5,143 Reviews |
$8.89
$6.49 |
Shop Now |
| 3 |
|
SUNNYSIDE CORPORATION Sunnyside 872G5 5-Gallon Boiled Linseed Oil | 327 Reviews | $135.56 | Shop Now |
Preparation
- In a large metal stockpot (find an old one – use it for outdoor projects like this), bring 7 liters (7 qt) of water to a boil.
- At the same time, mix the flour in 1 liter of water (1.5 qt). Pour the mix in the boiling water and let cook for 15 minutes while stirring.
- Add the coloring pigments as well as the Iron Sulfate, and keep stirring for 15 minutes.
- Then add the double-boiled Linseed Oil, and stir for another 15 minutes.
- Add the liquid soap, stir, remove from the heat source and let the mix cool down.
- The paint is ready to use. If you think it seems too thick or viscous, dilute it with water until you get the desired viscosity.
Application
- Do not apply while the surface is exposed directly to the sun, or on wood, that is wet/humid. The temperature must be higher than 5°C (41°F). You want it to be able to soak in and not evaporate. Ensure the wood is dry – if it’s too wet, it won’t absorb the Flour Paint.
- With new wood, it is recommended to use a primer, made from the paint diluted with 15-25% water.
- Use a paintbrush to apply. Apply a first coat, which will dry under an hour.
- Wait at least 24 hours to apply a final coat.
Tips
- It is strongly recommended to apply an additional coat approximately 1-2 years after the first application. This is to make sure the paint will last about a decade.
- You can use a mechanical mixer during the preparation to obtain a more uniform body (like the paint stirring sticks you hook to a drill).
- Clean the tools with soap and water, but be prepared to do a little scrubbing.
- The darker the pigment, the longer the paint will last.
- After 8 to 10 years, clean the surface with soapy water and apply two new coats.
- Even though it smells good and is non-toxic, the folks at Artdec.ca would advise against recycling the leftover paint in cocktails or fancy colored pancakes…
If you’re the curious type and would like to learn more about Flour Paint, look at this documentary to witness what can a 40-member team does with this paint in an entire village! The results are quite impressive!
PS: I’ve gotta give credit where it’s due. I didn’t invent it. I’m thankful for the people who hunted this down and shared it with the universe. Thanks to offgrid.net for making a concise forum posting about this. As always, if you build it (or make & paint it), we’ll post it! We welcome your comments and for you to share your experiences. Happy Palleting! – HeatherStiletto


