For our Pallet Kitchen Remodel Stage 1, we’ve used 14 pallets and have worked for 60 hours. But we’ve kept the cost down to 200.00 so far, which is excellent! Before we started, we searched nearby companies and collected a large stack of free pallets.
Planning:
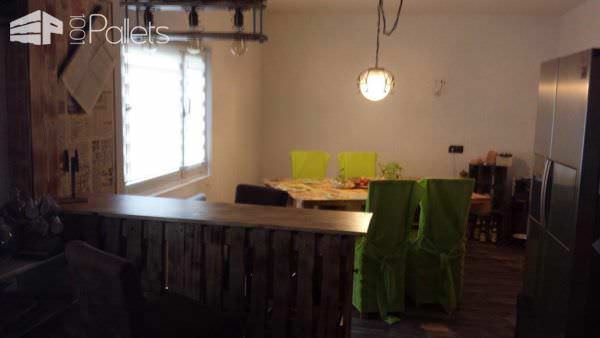
First, we had to plan. We wanted to remove a wall, and there are important considerations. You have to know if it is a load-bearing wall. Does it have plumbing or electrical already routed in it, etc… We removed a non-load-bearing wall to make room for a bar and to create a dining room area in our kitchen.
Table, under-window countertop, magazine rack & breakfast bar:
Table:
We made the table out of four EU-pallets after we completed the dividing wall demolition. The table build is fairly straightforward. We used two of the pallets to create the dining table surface. I used the other two pallets to create the support legs. The removed boards from the bottom deck filled in the gaps on the top deck. We had fun with this part of the build and did something to make it unique by adding a central basin with a lid that we can remove and put plants or anything else we want.
Under-window countertop & magazine rack:
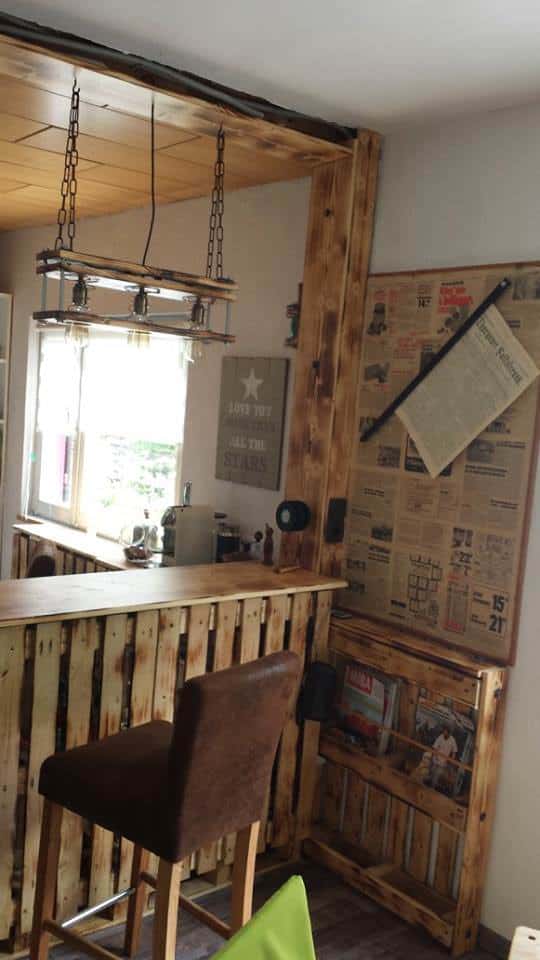
Everything else so far is made out of the “one-way” style of pallets (more details on types & sizes of wood pallets). We used these one-way pallets to create a counter by mounting a few against one wall and using extra deck boards to create a small countertop for appliances under the window. I modified another pallet by removing some of the bottom deck boards and added a small dowel rod to hold magazines. I added some fun under-counter lighting to illuminate the magazines and miscellaneous storage areas we made.
Breakfast Bar:
I used two ends of pallets with the blocks as the top and bottom of the bar and then used deck boards to frame it out. We glued more deck boards together and sanded them smooth to create the counters and bar top. I mounted the breakfast bar to the wall counters to create more stabilization. We used more pallets to frame around the demolished wall area.
Adding some flair with a wine rack and custom lighting:
Wine rack:
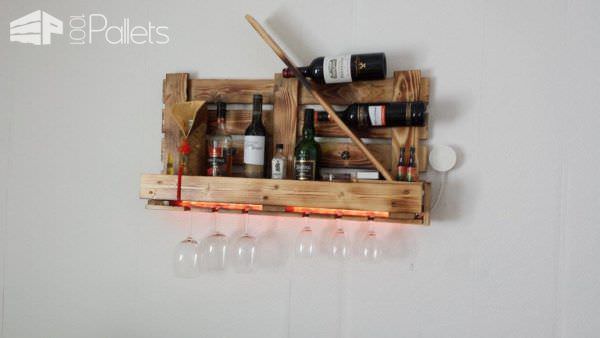
This was a simple part of the build. I made the wine rack out of a part of a pallet with a deck board added to the end to create a shelf. The natural top and bottom lead boards from the front and back of the shelf. We just cut notches into the added end piece to create stemware holders. But we couldn’t leave it just like an ordinary wine rack! I added flair with some recessed lighting to light up the bottles and stemware.
Custom Lighting:
We made a hanging lamp for over the bar using a vintage-style triple light pendant kit, sometimes known as an Edison lamp kit similar to the one here. Usually, the kits come with a template to drill out the proper hole sizes with a hole saw or jigsaw. This kit was a little different in that it used three deck boards, metal spacers, and spring frames that resemble old-style bedsprings around the bodies of the lighting units. We hung it with a bronzed chain. We chose larger Edison-style bulbs to create a warm glow, but also actually light up our counters.
Finish:
Burn it! We did a fun finish by doing some selective, careful burning* to create darker areas on the wood after sanding. We sealed everything with varnish.
EDITOR’S NOTE: Before remodeling a room, particularly if walls will be changed, we strongly recommend that you check with your local planning & zoning, or code enforcement offices that oversee permitting. Some remodeling may be considered minor, but some areas can actually require a permit to change out an electrical outlet. If you do unauthorized remodeling, it can impact the future resale of your property. You can be cited and fined during the project. You could be issued a stop order until you go through the legal steps.
*EDITOR’S NOTE: When doing any type of finish, in particular, types with burning, you should do this in an outdoor area, away from other flammables, and always have emergency equipment, such as a fire extinguisher or a garden hose at a minimum. ALWAYS use eye protection (wood knots can pop if the sap is overheated for one reason). Practice on a small piece of wood in a safe area to get a feel for it and for the equipment you’re using (such as a propane torch). Follow all safety guidelines with the equipment you’re using. If there is a fire, remember PASS: Pull the pin, Aim at the base of the fire, Squeeze the trigger, and Sweep back and forth.
PS – we can’t wait for stage 2 if this is your stage 1!






Emily Rose that’s a lush breakfast bar
Thomas Schmid… Bin immer noch mega stolz auf uns und unsere Küche..
Na warte bis die fertig ist ;-) … ich verspreche DIr das ist noch in diesem Leben :-D