According to the Cornhole Gaming Association (yes, there IS one – who knew?), proper cornhole game boards have specific dimensions. I did NOT know this at first, but once I started researching, I found out. Once I had the dimensions ( 24×48″, 3″ tall at the lowest point and 12″ from the ground at the back, and then the hole in the board had specific dimensions of size, placement, etc.). I then had to start to figure how to lay it out…and then incorporate some requests my friends had, including they wanted adjustable legs that would be more stable than their store-bought set that is breaking apart, foldable for an easier fit in their camper, and handles for easier transport. Well… alrighty! Challenge the nurse, why don’t you?
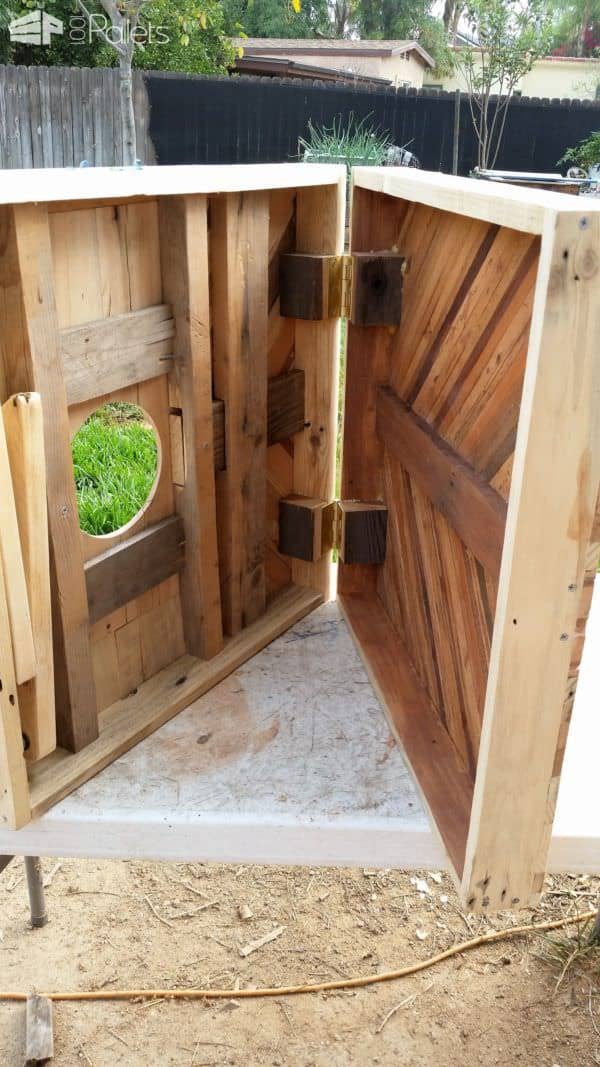
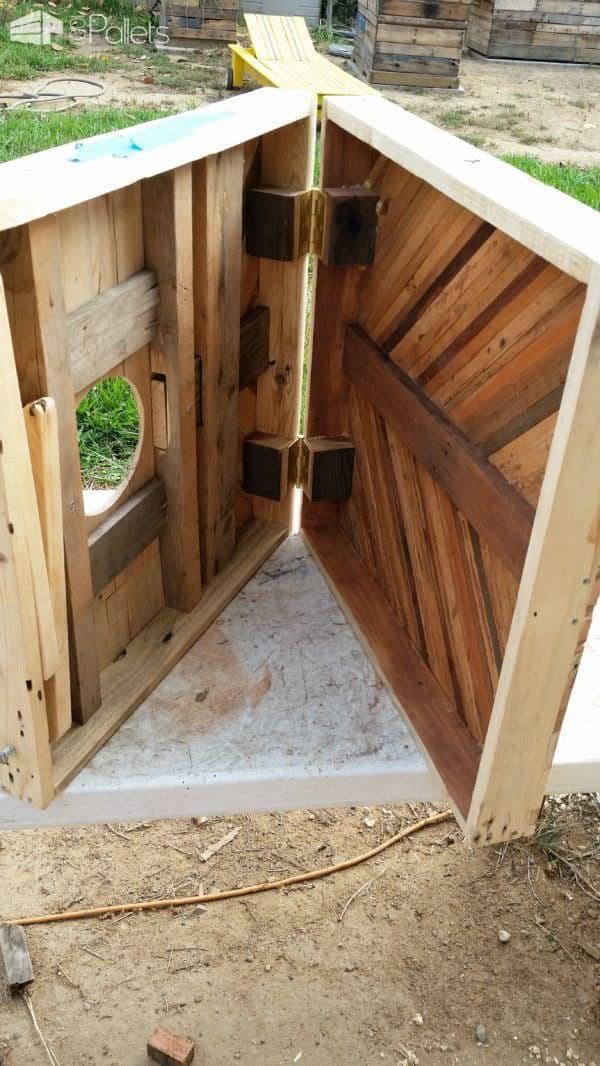
So I started sketching out ideas because I didn’t want to make it out of plywood. Why bother? They had one of those – and I could’ve repaired that a LOT faster than building a custom set, but that has no style. I wanted to use scraps to create patterns since I’ve been experimenting with veneers as well, so it seemed that the first pattern that would be good to try would be a chevron shape. I set up my table saw to rip 3/4″ strips, and set my chop saw to cut the angles quickly. I used a hand plane to smooth out any crookedness, and after building a 24×24″ frame with a center support/anchor point started working on the pattern. If I do this again, I’ll make the pattern WIDER, haha, as this took a while. I glued and then nailed each piece in. While the glue was drying, I started working on getting the main part of the board dimensioned out, and got the hole drilled, then sketched out a cartoon donkey. After getting it all painted, of COURSE, the pallet board split, and I had to patch/piece it together, and then further frame it out and fill in the necessary dimension gaps with more of the chevron patterns. Hence, why the back of the donkey board has a lot of weird board placements – this was from the board splitting! But after using Gorilla glue, clamps, and patience with a hand-plane, I finally got it built.
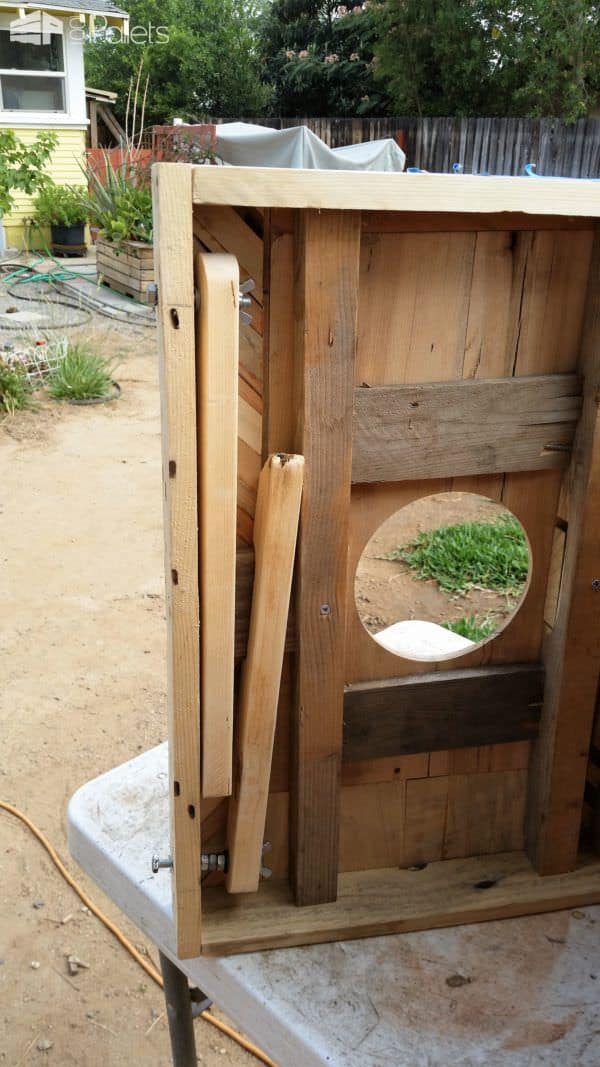
I wish I could remember where I found the idea for the legs, but it was for a totally different project. However, I loved the idea of the simple way to pivot the legs and make them adjustable. Initially, they did NOT have the little carve-out, but that had to be done when the painted donkey board split into pieces, and I had to add support boards. They then had to be able to fold into the board but sit OVER another piece of wood. Geesh! The hardware that’ll eventually install them in will be a simple bolt, gripper teeth washers on the external part of the board, then washers and split washers inside with wingnuts holding them in place. The one leg has to be spaced further from the external wall (the distance of the other leg), so I spaced that out with a couple of nuts that I simply ran, so they bound up against one another. All the hardware was reclaimed/leftover from goodness-knows-what – just from jars and cans from my husband’s shed, haha!
The last part was making it hinged. I used a couple of old brass hinges from old doors, and had to add blocks for them to mount to. I Gorilla-glued them in before screwing them securely. I had to chisel out a bit of each external side to accommodate the barrel portion of the hinge so that the boards could sit flush and the hinges wouldn’t interfere with anything, but just traced the outline of the hinges on the wood, scored it carefully with a utility knife, then slowly chiseled them out with a 1/4″ hand-chisel.
On to coating… well…. you see it before it’s even gotten one full coat because I was so excited that I finally conquered this project. It’s been a real challenge for me, with problem after problem arising, but now that it’s almost done, I’m proud. Is it perfect? No, but none of my projects are. However, my friends are thrilled with the preliminary posts I’ve shared with them so far, so that’s all that matters. :-D It’ll eventually receive five coats of water-based polyurethane coating (the stuff you’ll use for your floors), and I’ll sand between with a very fine-grit paper to pop any bubbles or remove any settling dust since I have to coat this outside. The inside will be coated with Behr stain/sealer just to help protect it (got a can on clearance that isn’t the greatest color, but it’ll be good enough for the inside of the board).
So don’t throw out those strips and scraps. You never know how you’ll use them. I’m finding I’m throwing out less and less because I’m figuring out ways to use wood in different fashions than just as standard shapes/sizes. Some of the chevron strips were from broken pallet boards that wouldn’t have been much good otherwise. Some of my older, broken oak pallet boards that had obviously sat out for a while and had become spalted! BONUS! :-D Hope you all enjoy!


