I have a very small home. We’re only 24-sq feet from being an official “tiny home”, so space is VERY LIMITED. What we do have is vertical space with very tall ceilings. Motorcycle gear, although modern and lightweight, takes up too much space in our tiny closets, so we were using some coat racks. Various styles have bent eventually, so I decided to build a modular, adjustable coat/garment rack system.
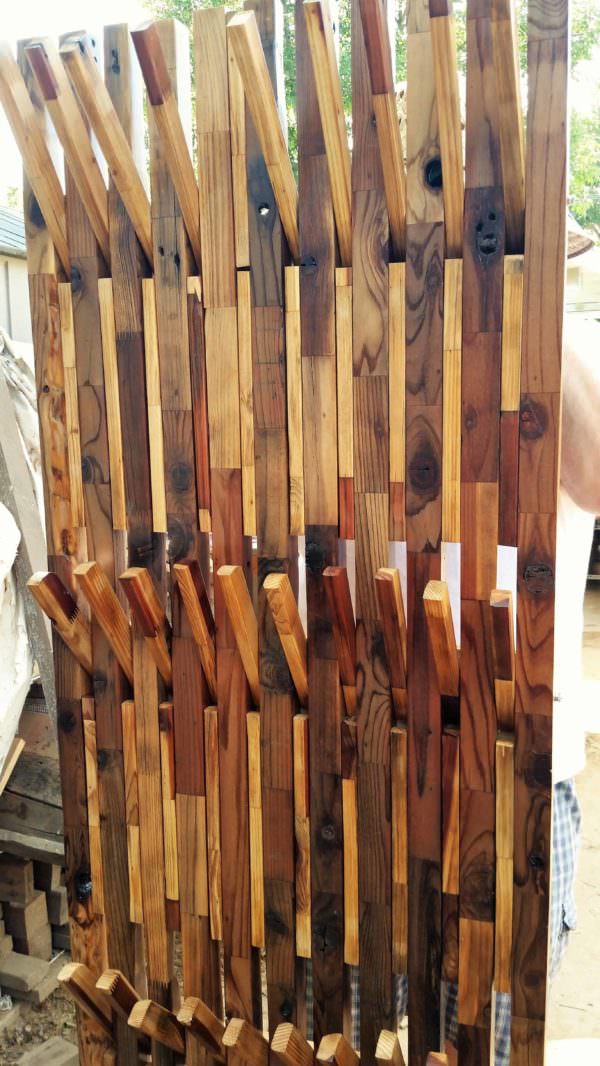
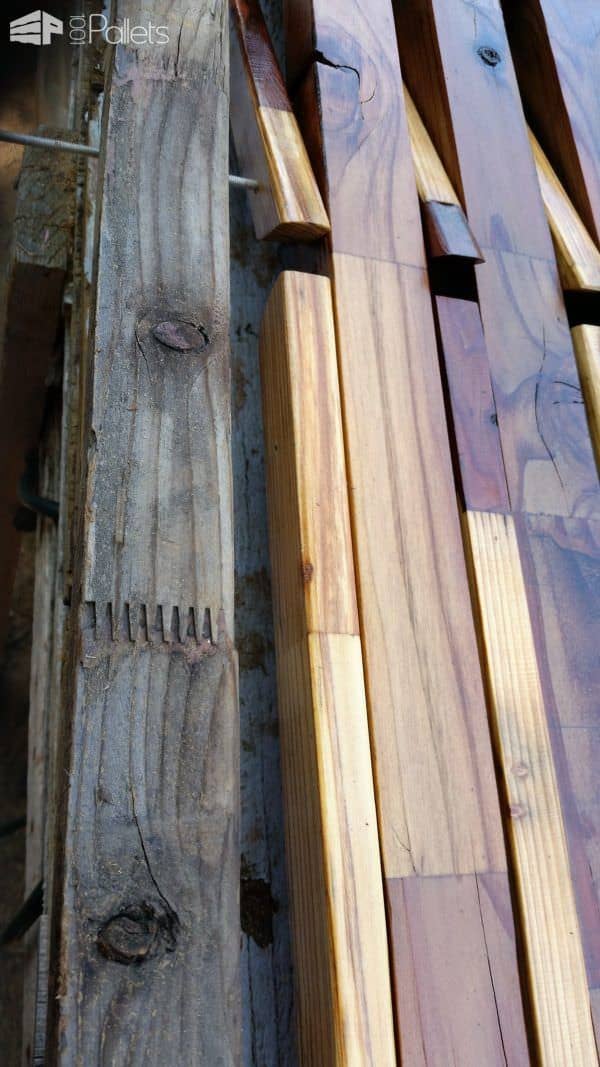
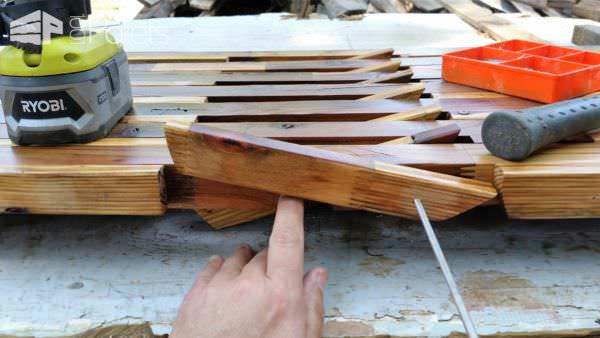
I got several weird pallets that were made out of – for want of a better term – engineered redwood. It was small sections of low-quality redwood dovetailed together to make long pieces of boards. I liked the joinery – it’s spiky and cool looking, so I tried to figure out what to do with it, and finally came up with this idea. I cut the boards to five feet tall and used alternating 2″ wide and 1″ wide boards. Some of the pieces were damaged, but as this isn’t holding a lot of weight, I only sanded down the damaged areas and left them as is. I then decided that I wanted three rows of hangers. Now, the “hangers” are simply pieces of the 1″ boards that were cut at an angle and drilled so that when they pivoted away from the wall, they’d naturally stop at about a 45-degree angle. When I didn’t want to use some (for example when hanging my helmet and didn’t need the adjacent hangers), I could simply push the unused ones back flush with the other boards. The pictures will make sense of this.
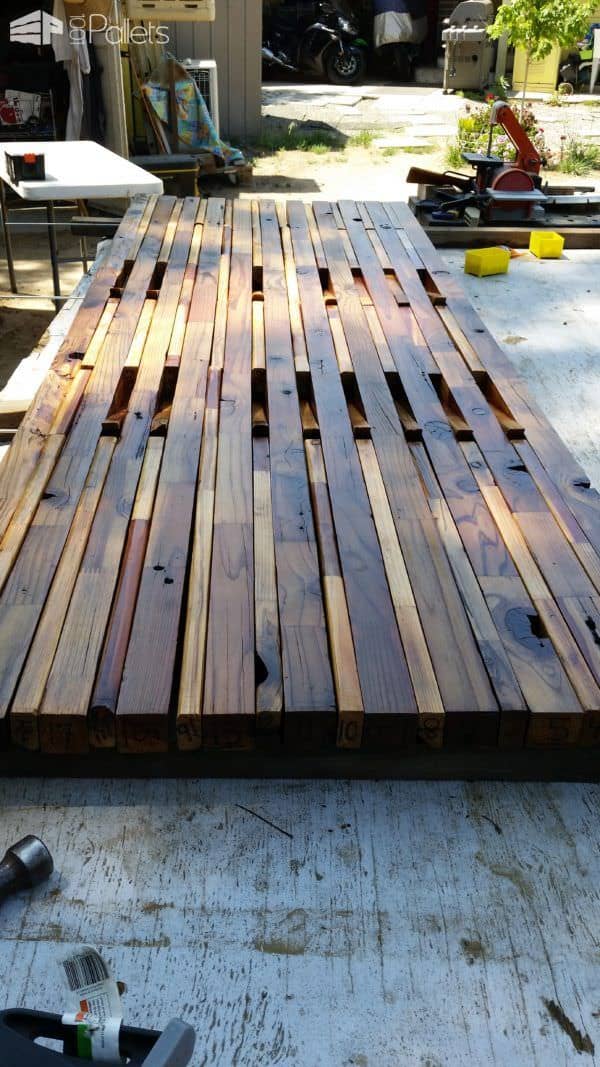
I decided on where to cut my boards, and first did the drilling BEFORE cutting. I used a table-top drill press, set up a long piece of wood and some clamps for stops, and that way I could be consistent, drilling three different sets of holes in each board. Once all the boards were drilled, I made some templates and drew on the 1″ wide boards the shapes I wanted to cut out/away to allow the pieces for pivoting, and for a little visual interest. I cut them all out, shaping them with a tabletop bandsaw, and then sanded them down with a belt sander/disc sander combo, smoothing pivot edges and rounding over the boards a bit, so they weren’t so sharp/pointy. I purchased three threaded rods – 3/16″ x 36″ (3.00 each), a pkg of washers and a package of nuts (1.00 each). I dry-fitted the three rods and ensured that all the pivot pieces could move properly, then disassembled after numbering them all so they’d go back together like I’d planned (some of the boards were warped. I used that and just found others that were twisted the other direction to cancel the warp out). You’ll see how I used a Sharpie marker on the bottoms of the pieces where it wouldn’t show when assembled and mounted on the wall.
I didn’t bother filling in old nail holes, or even a couple boards that I used Gorilla Glue on to repair small cracks. I left it rustic. :-D On to staining! I used two different colors – one slightly darker and the second was a “golden pecan” (Minwax stains). When the stain was dried, I then applied three coats total of polyurethane (for floors – high durability), sanding between each coat after it dried.
We decided to use a French Cleat hanging system, and simply picked three boards and cut them about 1/2 way at a 45-degree angle, so that the pieces would slide together, and the whole unit could be removed off of the wall, and mounted to studs while providing some stability to the piece as the urethane continues to do some more curing. It’ll allow me to tighten the hardware a bit as everything shrinks down. If I have problems with some of the hangers coming loose long-term, I’ve got little magnets that I can glue (scavenged from old magnetic connecting toys that I got from a Goodwill Clearance Center in Las Vegas for 25 cents). It’s not mounted in my living room yet – I just finished it today and wanted to share the photos.
No, there aren’t plans. I’m sure I saw something similar to inspire me – probably on Pinterest. I didn’t intentionally borrow the idea without being able to attribute it, so I’m not trying to pass this off as an original idea. :-D Whoever first came up with a similar idea that inspired me – THANK YOU!





Nicki Dunbar-Moncur for the porch?
Thanks for the proper term! I learned something new! :-D But I’ve gotta admit, the finger-jointed redwood is sturdier than I first thought. I’ve been using it for a couple of other projects (they’ll be submitted soon), and it’s surprisingly handy!
Huh – I’ll have to to go to the Big Orange Box and check out some framing studs to see. I don’t doubt you at all – just curious to see something else like these redwood boards :-D
That’s called finger jointing. Basically a process whereby otherwise scrap wood is joined to create useable lengths. Only other place I’ve seen it is in framing studs.
Very nice job
it looks awesome
Thank you very much! :-D